< Back ×
My Vehicle Change Vehicle
2010 Cadillac SRX
< Back to View All
Interior & Exterior Trim
- Department
- Prices
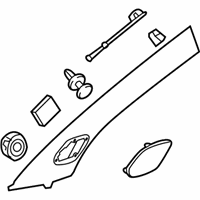
OEM (Genuine) 2010 Cadillac SRX Weatherstrip Pillar Trim
PartNumber: 23202673 Product Specifications
- Notes: Titanium
- Location: Driver Side
- Other Names: Weatherstrip Pillar Trim
- Item Dimensions: 32.9 x 10.8 x 6.3 inches
- Item Weight: 1.10 Pounds
- Fitment Type: Direct Replacement
- Replaces: 20905663
- Part Description: 2010 Cadillac SRX Weatherstrip Pillar Trim
Vehicle Fitment- 2010 Cadillac SRX | Base, Luxury, Performance, Premium | 6 Cyl 2.8 L GAS, 6 Cyl 3.0 L GAS, 6 Cyl 3.6 L FLEX, 6 Cyl 3.6 L GAS
$27.55 MSRP:$41.57You Save: $14.02 (34%)OEM (Genuine) 2010 Cadillac SRX Molding Asm-Windshield Garnish *Titanium
PartNumber: 23202669 Product Specifications
- Notes: Titanium
- Location: Passenger Side
- Other Names: Weatherstrip Pillar Trim
- Item Dimensions: 32.2 x 10.9 x 5.9 inches
- Item Weight: 1.10 Pounds
- Fitment Type: Direct Replacement
- Replaces: 20905666
- Part Description: 2010 Cadillac SRX Molding Asm-Windshield Garnish *Titanium
Vehicle Fitment- 2010 Cadillac SRX | Base, Luxury, Performance, Premium | 6 Cyl 2.8 L GAS, 6 Cyl 3.0 L GAS, 6 Cyl 3.6 L FLEX, 6 Cyl 3.6 L GAS
$27.60 MSRP:$41.66You Save: $14.06 (34%)OEM (Genuine) 2010 Cadillac SRX Weatherstrip Pillar Trim
PartNumber: 23202674 Product Specifications
- Notes: Shale
- Location: Driver Side
- Other Names: Weatherstrip Pillar Trim
- Item Dimensions: 31.9 x 10.5 x 6.2 inches
- Item Weight: 1.10 Pounds
- Fitment Type: Direct Replacement
- Replaces: 20905668
- Part Description: 2010 Cadillac SRX Weatherstrip Pillar Trim
Vehicle Fitment- 2010 Cadillac SRX | Base, Luxury, Performance, Premium | 6 Cyl 2.8 L GAS, 6 Cyl 3.0 L GAS, 6 Cyl 3.6 L FLEX, 6 Cyl 3.6 L GAS
OEM (Genuine) 2010 Cadillac SRX Weatherstrip Pillar Trim
PartNumber: 23202670 Product Specifications
- Notes: Shale
- Location: Passenger Side
- Other Names: Weatherstrip Pillar Trim
- Item Dimensions: 7.0 x 3.3 x 29.1 inches
- Item Weight: 1.10 Pounds
- Fitment Type: Direct Replacement
- Replaces: 20905667
- Part Description: 2010 Cadillac SRX Weatherstrip Pillar Trim
Vehicle Fitment- 2010 Cadillac SRX | Base, Luxury, Performance, Premium | 6 Cyl 2.8 L GAS, 6 Cyl 3.0 L GAS, 6 Cyl 3.6 L FLEX, 6 Cyl 3.6 L GAS
FAQ for Pillar Panels Repair
Q: How to replace the body hinge pillar trim panel?
A:
You should remove the instrument panel side trim panel and reposition the front floor panel carpet as needed.
By Bob
GM Specialist
02/11/2022Q: How to replace the center pillar lower trim panel?
A:
You should remove the body hinge pillar trim panel grasp both sides and pull out toward the inside of the vehicle to release the 2 push pins on the backside and disconnect the electrical connector if equipped.
By Bob
GM Specialist
02/11/2022Q: How to replace the front side door window garnish molding?
A:
You should remove the interior trim panel and use a plastic flat-bladed tool to remove the push-in retainers.
By Bob
GM Specialist
02/11/2022Q: How many retainers attach to the front door frame garnish molding?
A:
There are 2 retainers that attach the front door frame garnish molding.
By Bob
GM Specialist
02/11/2022Q: How many retainers attach to the rear side door window garnish molding?
A:
There are 2 retainers that attach the rear side door window garnish molding.
By Bob
GM Specialist
02/11/2022Q: How to replace the rear side door window garnish molding?
A:
You should remove the rear side door trim, use a door trim panel removal tool or equivalent to aid in the removal of the retainer, and pull outward starting at the front and moving slowly rearward to remove the molding.
By Bob
GM Specialist
02/11/2022Q: How many fasteners attach to the front side door pull handle?
A:
There are 2 fasteners that attach the front side door pull handle.
By Bob
GM Specialist
01/11/2022Q: How to replace the rear side door trim panel applique?
A:
You should remove the rear side door trim panel.
By Bob
GM Specialist
01/11/2022Q: How to replace the front side door accessory switch mount plate?
A:
You should disconnect the electrical connector from the switch assembly and transfer parts as necessary.
By Bob
GM Specialist
01/11/2022Q: How to replace the front side door armrest?
A:
You should remove the door accessory switch mount plate and the door trim panel.
By Bob
GM Specialist
01/11/2022See more FAQs (17)


