< Back ×
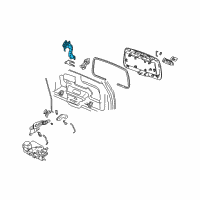
2009 Chevrolet Trailblazer Trunk Lid Latch
My Vehicle Change Vehicle
2009 Chevrolet Trailblazer
< Back to View All
Trunks & Tailgates
- Department
- Prices
- $88.93 MSRP:
$134.18You Save: $45.25 (34%)Product Specifications- Notes: All Models; Short Wheel Base, Gate Glass
- Other Names: Latch, Window Latch
- Item Dimensions: 4.8 x 4.8 x 11.3 inches
- Item Weight: 1.20 Pounds
- Fitment Type: Direct Replacement
- Replaces: 15132517, 15086837
- Part Description: 2009 Chevrolet Trailblazer Latch
Vehicle Fitment- 2009 Chevrolet Trailblazer | Base, LS, LT, LTZ, North Face, SS | 6 Cyl 4.2 L GAS, 8 Cyl 5.3 L GAS, 8 Cyl 6.0 L GAS
FAQ for Trunk Lid Latch Repair
Q: What is the recommended torque for the latch bolts?
A:
The recommended torque is 10 N.m (89 lb in).
By Bob
GM Specialist
01/11/2022Q: How to remove the Liftgate Latch?
A:
First, you need to remove the liftgate window garnish molding, and the liftgate trim panel, disconnect the outside handle rod from the bellcrank and disconnect the bellcrank rod from the latch/lock assembly. Then, please remove the bellcrank from the latch/lock, disconnect the electrical connector from the latch assembly, and disconnect the lock cylinder bellcrank rod from the latch assembly. Finally, you should remove the screws that retain the latch/lock assembly to the liftgate, and remove the latch/lock assembly from the liftgate.
By Bob
GM Specialist
01/11/2022Q: How to remove the Liftgate Window Latch?
A:
First, you need to remove the liftgate window garnish molding and the liftgate trim panel. Then, please remove the bolts that retain the latch to the liftgate. Finally, you should disconnect the electrical connector and remove the latch from the liftgate.
By Bob
GM Specialist
01/11/2022Q: What is the recommended torque for the liftgate window striker nuts?
A:
The recommended torque is 6 N.m (53 lb in).
By Bob
GM Specialist
01/11/2022Q: How to install the Liftgate Latch?
A:
First, you need to position the latch/lock assembly to the liftgate, install the screws that retain the latch/lock assembly to the liftgate, connect the lock cylinder bellcrank rod to the latch/lock assembly, and connect the electrical connector to the latch/lock assembly. Then, please position the bellcrank to the latch/lock assembly, connect the bellcrank rod to the latch/lock assembly, and connect the outside handle rod to the bellcrank. Finally, you should install the liftgate trim panel and the liftgate window garnish molding.
By Bob
GM Specialist
01/11/2022Q: How to install the Liftgate Window Latch?
A:
First, you need to position the latch to the liftgate and connect the electrical connector. Then, please install the bolts that retain the latch to the lift gate and adjust the portion of the latch to allow the liftgate window striker to enter the center of the latch. Finally, you should install the liftgate trim panel and install the liftgate window garnish molding.
By Bob
GM Specialist
01/11/2022Q: How to adjust the Liftgate Window Latch Striker?
A:
First, you need to inspect the liftgate window for proper fit to the liftgate window weatherstrip. Then, please open the liftgate window, loosen the nuts retaining the liftgate striker to the liftgate window, and remove or add shims. Finally, you should inspect the liftgate window for proper fit, and close the liftgate window.
By Bob
GM Specialist
01/11/2022See more FAQs (2)

