< Back ×
My Vehicle Change Vehicle
2009 Chevrolet Trailblazer
< Back to View All
Brake Boosters & Brake Master Cylinders
- Department
- Series
- Brands
- Prices
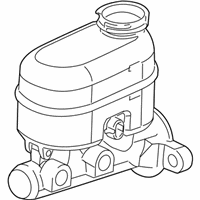
OEM (Genuine) 2009 Chevrolet Trailblazer Master Cylinder
PartNumber: 25828524 Product Specifications
- Other Names: Master Cylinder
- Item Dimensions: 9.3 x 7.1 x 6.1 inches
- Item Weight: 2.20 Pounds
- Fitment Type: Direct Replacement
- Replaced by: 19417223
- Part Description: 2009 Chevrolet Trailblazer Master Cylinder
Vehicle Fitment- 2009 Chevrolet Trailblazer | LT, SS | 6 Cyl 4.2 L GAS, 8 Cyl 5.3 L GAS, 8 Cyl 6.0 L GAS
$161.17 MSRP:$293.06You Save: $131.89 (46%)

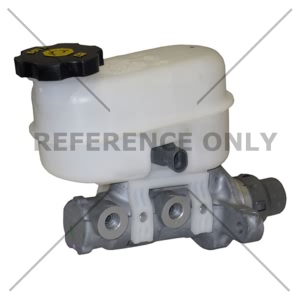
Centric® Premium™ Brake Master Cylinder for 2009 Chevrolet Trailblazer
PartNumber: 130.66074Product Specifications- UPC: 805890655459
- Part Description: 2009 Chevrolet Trailblazer Premium™ Brake Master Cylinder
Vehicle Fitment- 2009 Chevrolet Trailblazer | All Trims | All Engines


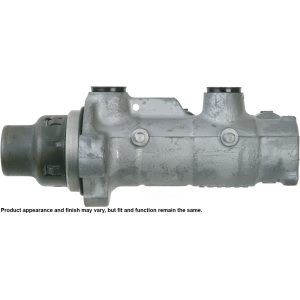
Cardone Reman® Remanufactured Master Cylinder for 2009 Chevrolet Trailblazer
PartNumber: 10-3998Product Specifications- Notes: Supplied w/o Reservoir
- Bore Diameter (N): 1.00"
- E-Waste: No
- Installation Hardware Included: No
- Master Cylinder Color/Finish: Gray
- Master Cylinder Material: Aluminum
- Mounting Hole Quantity: 2
- Package Contents: Master Cylinder
- Port Quantity: 2
- Primary Port Size: M13 x 1.5
- Product Condition: Remanufactured
- Reservoir Included: No
- Secondary Port Size: M13 x 1.5
- UPC: 082617888912
- Part Description: 2009 Chevrolet Trailblazer Remanufactured Master Cylinder
Vehicle Fitment- 2009 Chevrolet Trailblazer | All Trims | All Engines
FAQ for Brake Master Cylinder Repair
Q: How to install the Master Cylinder?
A:
First, you need to bench bleed the master cylinder and install the master cylinder and the O-ring seal to the power vacuum brake booster. Ensure the O-ring seal is properly seated in the groove in the master cylinder body. Then, please install the master cylinder nuts and tighten the nuts to 36 N.m (27 lb-ft) and connect the master cylinder secondary brake pipe fitting and tighten the fitting to 32 N.m (24 lb-ft). Finally, you should connect the master cylinder primary brake pipe fitting and tighten the fitting to 32 N.m (24 lb-ft) and connect the master cylinder fluid level sensor electrical connector.
By Bob
GM Specialist
01/11/2022Q: How to install the Master Cylinder Reservoir?
A:
First, you need to lubricate the master cylinder reservoir seals and the reservoir barrel sealing areas with GM-approved brake fluid from a clean, sealed brake fluid container. Then, please install the master cylinder reservoir seals and ensure the seals are fully seated in the master cylinder body. Finally, you should install the master cylinder reservoir to the master cylinder and fill the master cylinder reservoir.
By Bob
GM Specialist
01/11/2022Q: How to remove the Master Cylinder Reservoir?
A:
First, you need to remove the brake fluid from the master cylinder reservoir and discard it in an approved container. Then, please spread the master cylinder reservoir locking tabs and lift the reservoir upward from the master cylinder. Finally, you should clean the area surrounding the master cylinder and the master cylinder body with denatured alcohol and a clean shop cloth, and remove the master cylinder reservoir seals.
By Bob
GM Specialist
01/11/2022Q: How to remove the Master Cylinder?
A:
First, you need to apply and release the brake pedal several times until the pedal becomes firm to deplete the power vacuum brake booster vacuum reserve, and use a suitable tool to remove the brake fluid from the brake master cylinder reservoir. Then, please discard the brake fluid into an approved container and disconnect the master cylinder fluid level sensor electrical connector, the master cylinder secondary brake pipe fitting, and the master cylinder primary brake pipe fitting. Finally, you should remove the master cylinder nuts, the master cylinder and remove the O-ring seal from the master cylinder body.
By Bob
GM Specialist
01/11/2022Q: How to perform the Master Cylinder Bench Bleeding?
A:
First, you need to secure the mounting flange of the brake master cylinder in a bench vise, remove the master cylinder reservoir cap and diaphragm, install suitable fittings to the master cylinder ports that match the type of flare seat required, and also provide for hose attachment, and install transparent hoses to the fittings installed to the master cylinder ports, then route the hoses into the master cylinder reservoir. Then, please fill the master cylinder reservoir to at least the halfway point with GM-approved brake fluid from a clean, sealed brake fluid container, ensure that the ends of the transparent hoses running into the master cylinder reservoir are fully submerged in the brake fluid, use a smooth, round-ended tool to depress and release the primary piston as far as it will travel, a depth of about 25 mm (1 in), several times. As air is bled from the primary and secondary pistons, the effort required to depress the primary piston will increase and the amount of travel will decrease. You need to continue to depress and release the primary piston until fluid flows freely from the ports with no evidence of air bubbles, remove the transparent hoses from the master cylinder reservoir, and install the master cylinder reservoir cap and diaphragm. Finally, you should remove the fittings with the transparent hoses from the master cylinder ports, wrap the master cylinder with a clean shop cloth to prevent brake fluid spills, and remove the master cylinder from the vise.
By Bob
GM Specialist
01/11/2022Q: What is the procedure for filling the Master Cylinder Reservoir?
A:
You need to visually inspect the brake fluid level through the brake master cylinder reservoir. If the brake fluid level is at or below the half-full point during routine fluid checks, the brake system should be inspected for wear and possible brake fluid leaks. If the brake fluid level is at or below the half-full point during routine fluid checks, and an inspection of the brake system did not reveal wear or brake fluid leaks, the brake fluid may be topped off up to the maximum-fill level. If brake system service was just completed, the brake fluid may be topped off up to the maximum-fill level. If the brake fluid level is above the half-full point, adding brake fluid is not recommended under normal conditions. If the brake fluid is to be added to the master cylinder reservoir, you should clean the outside of the reservoir on and around the reservoir cap before removing the cap and diaphragm.
By Bob
GM Specialist
01/11/2022See more FAQs (1)


