< Back ×
2009 Chevrolet Equinox A/C Evaporator Core
My Vehicle Change Vehicle
2009 Chevrolet Equinox
< Back to View All
A/C & Heating
- Department
- Brands
- Prices
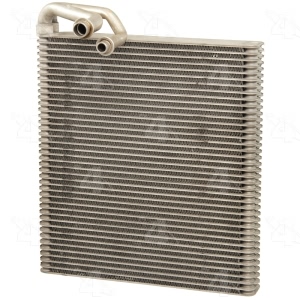
 $124.52Product Specifications
- Notes: Evaporator replacement for this application may require considerable time, specialty tools, and training.
- Core Depth Fraction: 1-1/2
- Core Depth MM: 38.100
- Core Height Fraction: 10-7/8
- Core Height MM: 276.225
- Core Width Fraction: 10
- Core Width MM: 254.000
- Depth: 1.500
- Height: 10.875
- Inlet Fitting Outside Diameter: No. 8
- Inlet Fitting Type: Flange
- Material: Aluminum
- O-Ring A Number/Desc: [24402] / Slimline Washer
- O-Ring A Quantity: 1
- O-Ring B Number/Desc: [24403] / Slimline Washer
- O-Ring B Quantity: 1
- Outlet Fitting Outside Diameter: No. 10
- UPC: 096361549739
- Width: 10.000
- Part Description: 2009 Chevrolet Equinox A C Evaporator Core
Vehicle Fitment- 2009 Chevrolet Equinox | All Trims | All Engines
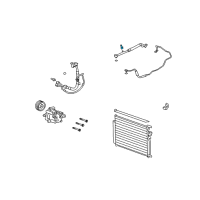 Product Specifications
- Notes: 2006-09; Equinox
- Other Names: Evaporator Core, Rear AC Hose Valve
- Item Dimensions: 9.2 x 18.5 x 13.1 inches
- Item Weight: 12.00 Pounds
- Replaces: 25833533, 15781514
- Part Description: 2009 Chevrolet Equinox Rear AC Hose Valve
Vehicle Fitment- 2009 Chevrolet Equinox | LS, LT, LTZ, Sport | 6 Cyl 3.4 L GAS, 6 Cyl 3.6 L GAS
 Product Specifications
- Notes: 2006-09
- Location: Driver Side
- Other Names: Evaporator Case
- Item Dimensions: 18.4 x 20.2 x 12.8 inches
- Item Weight: 5.90 Pounds
- Fitment Type: Direct Replacement
- Replaces: 25792070, 15781481, 15841825
- Part Description: 2009 Chevrolet Equinox Evaporator Case
Vehicle Fitment- 2009 Chevrolet Equinox | LS, LT, LTZ, Sport | 6 Cyl 3.4 L GAS, 6 Cyl 3.6 L GAS
 Product Specifications
- Notes: 2006-09
- Location: Passenger Side
- Other Names: Evaporator Case
- Item Dimensions: 21.0 x 18.7 x 8.8 inches
- Item Weight: 5.20 Pounds
- Fitment Type: Direct Replacement
- Replaces: 15781503
- Part Description: 2009 Chevrolet Equinox Case, A/C Evaporator (RH)
Vehicle Fitment- 2009 Chevrolet Equinox | LS, LT, LTZ, Sport | 6 Cyl 3.4 L GAS, 6 Cyl 3.6 L GAS
FAQ for A/C Evaporator Core Repair
Q: What is the air conditioning evaporator core installation procedure?
A:
First, add the proper PAG oil to the evaporator core and install the evaporator core to the blower case assembly. Next, assemble the two halves of the blower case assembly, install the blower case assembly screws and tighten to 1.5 Nm. After that install the HVAC module in front of the dash seal and install the new washers to the evaporator pipes. Install the TXV, and the backing plate to the evaporator pipes, install the TXV screws to the backing plate and tighten the screws to 3.5 Nm. Finally, install the evaporator case assembly and install the HVAC module.
By Bob
GM Specialist
28/10/2022Q: What is the A/C evaporator case installation procedure?
A:
First, install the evaporator case assembly to the blower case assembly. Next, install the evaporator case assembly screws to the blower case assembly and tighten the screws to 1.5 Nm. Install the heater core to the HVAC module, install the heater core cover, install the heater core cover screws and tighten the screws to 1.5 Nm. Finally, install the HVAC module.
By Bob
GM Specialist
28/10/2022