< Back ×
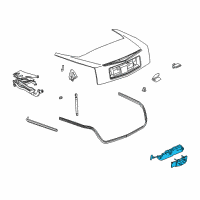
2009 Cadillac XLR Trunk Lid Latch
My Vehicle Change Vehicle
2009 Cadillac XLR
< Back to View All
Trunks & Tailgates
- Department
- Prices
 Product Specifications
- Other Names: Latch, Lock
- Item Dimensions: 24.5 x 5.1 x 4.9 inches
- Item Weight: 5.10 Pounds
- Fitment Type: Direct Replacement
- Replaces: 15227201, 10346756, 10352891
- Part Description: 2009 Cadillac XLR Rear Compartment Lid Latch Assembly
Vehicle Fitment- 2009 Cadillac XLR | Base, Platinum, V | 8 Cyl 4.4 L GAS, 8 Cyl 4.6 L GAS
FAQ for Trunk Lid Latch Repair
Q: What is the rear compartment lid latch installation procedure?
A:
Place the latch on the rear compartment panel, install the nuts attaching the latch to the rear compartment panel and tighten the nuts to 10 Nm. Connect the manual release cable to the latch and the electrical connector to the latch. Next, install the rear fascia and re-position the rear center compartment carpet.
By Bob
GM Specialist
01/11/2022Q: What is the rear compartment door manual release installation procedure?
A:
First, attach the replacement cable end to the mechanics wire and pull the mechanics wire back through the carpet. Next, install the cable end on the latch and seat the cables into the molded latch cover recess. Install the latch cover, and the latch cover fasteners and tighten to 2 Nm. Next, install the electrical connector, install the fasteners through the cover plate and to the B-pillar mounted door latch and tighten to 10 Nm. Install the new mastic cover over the latch access hole in the body and install the B-pillar interior trim. Finally, install the door sill trim.
By Bob
GM Specialist
01/11/2022