< Back ×
My Vehicle Change Vehicle
2009 Cadillac XLR
< Back to View All
Hoods
- Department
- Prices
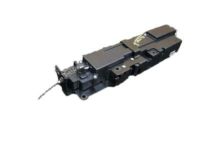
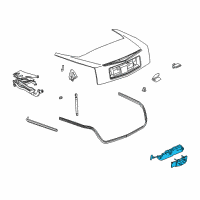
OEM (Genuine) 2009 Cadillac XLR Rear Compartment Lid Latch Assembly
PartNumber: 15847487 Product Specifications
- Other Names: Latch, Lock
- Item Dimensions: 24.5 x 5.1 x 4.9 inches
- Item Weight: 5.10 Pounds
- Fitment Type: Direct Replacement
- Replaces: 15227201, 10346756, 10352891
- Part Description: 2009 Cadillac XLR Rear Compartment Lid Latch Assembly
Vehicle Fitment- 2009 Cadillac XLR | Base, Platinum, V | 8 Cyl 4.4 L GAS, 8 Cyl 4.6 L GAS
OEM (Genuine) 2009 Cadillac XLR Latch Asm-Hood Primary & Secondary
PartNumber: 15910870 Product Specifications
- Other Names: Latch, Lock
- Item Dimensions: 16.1 x 11.1 x 8.8 inches
- Item Weight: 1.30 Pounds
- Fitment Type: Direct Replacement
- Replaces: 15233603, 10342003
- Part Description: 2009 Cadillac XLR Latch Asm-Hood Primary & Secondary
Vehicle Fitment- 2009 Cadillac XLR | Base, Platinum, V | 8 Cyl 4.4 L GAS, 8 Cyl 4.6 L GAS
FAQ for Hood Latch Repair
Q: What is the proper way to remove the seal from the fender?
A:
The proper way is to remove the seal and all the adhesives.
By Bob
GM Specialist
01/11/2022Q: What is the hood primary and secondary latch installation procedure?
A:
First, install the hood latch to the latch support, install the bolts attaching the latch to the latch support, and tighten to 9 Nm. Next, connect the hood release cable to the latch and the secondary latch cable to the latch. Lower the hood and check the latch for proper alignment. Finally, install the front section of the air cleaner assembly.
By Bob
GM Specialist
01/11/2022Q: What is the hood hinge removal procedure?
A:
Make sure to use a wax pencil to mark the location of the upper and lower hood hinge. Next, remove the hood.
By Bob
GM Specialist
01/11/2022Q: What is the hood rear seal removal procedure?
A:
Open the hood and remove the rear hood seal from the lower plenum.
By Bob
GM Specialist
01/11/2022Q: What is the hood rear seal installation procedure?
A:
Place the seal to the lower plenum and align the top lip of the seal face rearward for proper installation. Next secure the seal to lower the plenum and close the hood.
By Bob
GM Specialist
01/11/2022Q: What is the installation procedure for the seal to the fender?
A:
The procedure is to place the seal on the fender and press the seal onto the fender.
By Bob
GM Specialist
01/11/2022Q: What is the hood secondary latch installation procedure?
A:
Install the secondary latch to the front panel, install the bolts attaching the secondary latch to the front panel and tighten to 9 Nm. Next, connect the secondary latch cable to the hood latch and install the front section of the air cleaner assembly.
By Bob
GM Specialist
01/11/2022Q: What is the hood bumper installation procedure?
A:
Install the front hood and the adjustable front hood bumpers to the vehicle. Adjust the front hood bumpers and close the hood.
By Bob
GM Specialist
01/11/2022See more FAQs (3)


