< Back ×

My Vehicle Change Vehicle
2008 Chevrolet Trailblazer
< Back to View All
Driveline, Axles & 4WD
- Department
- Brands
- Prices
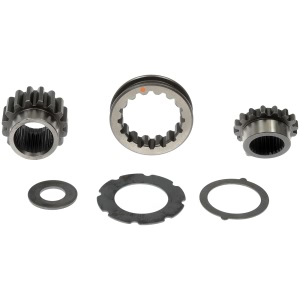

Dorman® OE Solutions Front 4Wd Disconnect Gear Kit for 2008 Chevrolet Trailblazer
PartNumber: 600-117Product Specifications- Axle Gear: 1 Piece
- Clutch Gear : 1 Piece
- Collar: 1 Piece
- Includes: Washer Spacers - 3 Pieces
- UPC: 019495515999
- Part Description: 2008 Chevrolet Trailblazer OE Solutions Front 4Wd Disconnect Gear Kit
Vehicle Fitment- 2008 Chevrolet Trailblazer | All Trims | All Engines
$177.72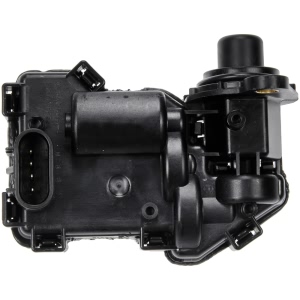
Dorman® OE Solutions 4Wd Actuator for 2008 Chevrolet Trailblazer
PartNumber: 600-103Product Specifications- Housing Material: Plastic
- OE Part Number: 12471631
- Package Contents: 4wd Actuator Assembly
- Terminal Quantity: 4
- Terminal Type: Blade
- UPC: 019495095095
- Wiring Harness Included: No
- Part Description: 2008 Chevrolet Trailblazer OE Solutions 4Wd Actuator
Vehicle Fitment- 2008 Chevrolet Trailblazer | All Trims | All Engines
$82.57
FAQ for 4Wd Actuator Repair
Q: How to install the Transfer Case Motor/Encoder?
A:
First, you should connect the wiring harness and insert a suitable tool alongside the internal wires. Next, you should install the motor/encoder baseplate/gasket, the motor/encoder, and the fuel tank shield. Finally, you should connect the motor/encoder electrical connector.
By Bob
GM Specialist
01/11/2022Q: What is the recommended torque for the actuator assembly bolts?
A:
The recommended torque is 6 N.m (53 lb in).
By Bob
GM Specialist
01/11/2022Q: How to install the Front Drive Axle Actuator?
A:
You should install the actuator assembly, the actuator assembly bolts, and the engine protection shield. In addition, you should connect the electrical connector to the actuator assembly.
By Bob
GM Specialist
01/11/2022Q: What is the recommended torque for the bolts securing the encoder mounting to the transfer case?
A:
The recommended torque is 16 N.m (12 lb-ft).
By Bob
GM Specialist
01/11/2022Q: What should be noted when removing the motor/encoder?
A:
You should make sure that the motor/encoder is in the 2HI position.
By Bob
GM Specialist
01/11/2022Q: How to install the Transfer Case Motor/Encoder (TrailBlazer, Envoy, Rainier)?
A:
First, you should connect the wiring harness and insert a suitable tool alongside the internal wires. Next, you should install the motor/encoder baseplate/gasket, the motor/encoder, and the fuel tank shield. Finally, you should connect the motor/encoder electrical connector.
By Bob
GM Specialist
01/11/2022Q: How to remove the Front Drive Axle Actuator?
A:
You should disconnect the electrical connector and remove the following parts: the engine protection shield, the actuator assembly bolts, and the actuator assembly.
By Bob
GM Specialist
01/11/2022Q: What should be noted when installing the encoder to the transfer case?
A:
You should make sure that the encoder unit is flat against the transfer case.
By Bob
GM Specialist
01/11/2022Q: What is the recommended torque for the bolts securing the motor/encoder mounting to the transfer case?
A:
The recommended torque is 16 N.m (12 lb-ft).
By Bob
GM Specialist
01/11/2022Q: What should be noted when installing the Transfer Case Motor/Encoder?
A:
You should note the °Hex° in the housing where the new sensor will seat.
By Bob
GM Specialist
01/11/2022See more FAQs (6)