< Back ×
My Vehicle Change Vehicle
2007 Chevrolet Malibu
< Back to View All
Interior & Exterior Trim
- Department
- Prices
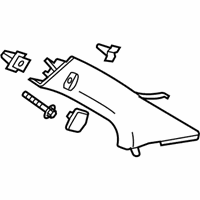
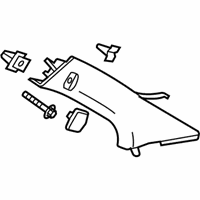
OEM (Genuine) 2007 Chevrolet Malibu Molding Asm-Windshield Side Upper Garnish *Neutral L
PartNumber: 22735734 Product Specifications
- Notes: Sedan, Neutral; Wagon, Neutral
- Location: Driver Side
- Other Names: Weatherstrip Pillar Trim
- Item Dimensions: 33.7 x 6.7 x 5.8 inches
- Item Weight: 0.90 Pounds
- Fitment Type: Direct Replacement
- Part Description: 2007 Chevrolet Malibu Molding Asm-Windshield Side Upper Garnish *Neutral L
Vehicle Fitment- 2007 Chevrolet Malibu | Base, Classic LS, Classic LT, LS, LT, LTZ, Maxx, Maxx LS, Maxx LT, Maxx LTZ, Maxx SS, SS | 4 Cyl 2.2 L GAS, 6 Cyl 3.5 L GAS, 6 Cyl 3.9 L GAS
OEM (Genuine) 2007 Chevrolet Malibu Molding Asm-Windshield Side Upper Garnish *Light Ttnum
PartNumber: 21993337 Product Specifications
- Notes: Sedan, Titanium; Wagon, Titanium
- Location: Passenger Side
- Other Names: Weatherstrip Pillar Trim
- Item Dimensions: 29.3 x 5.5 x 4.1 inches
- Item Weight: 0.80 Pounds
- Fitment Type: Direct Replacement
- Part Description: 2007 Chevrolet Malibu Molding Asm-Windshield Side Upper Garnish *Light Ttnum
Vehicle Fitment- 2007 Chevrolet Malibu | Classic LS, Classic LT, LS, LT, LTZ, Maxx LS, Maxx LT, Maxx LTZ, Maxx SS, SS | 4 Cyl 2.2 L GAS, 6 Cyl 3.5 L GAS, 6 Cyl 3.9 L GAS
OEM (Genuine) 2007 Chevrolet Malibu Molding Asm-Windshield Side Upper Garnish *Light Ttnum
PartNumber: 21993338 Product Specifications
- Notes: Sedan, Titanium; Wagon, Titanium
- Location: Driver Side
- Other Names: Weatherstrip Pillar Trim
- Item Dimensions: 33.7 x 6.5 x 5.6 inches
- Item Weight: 0.90 Pounds
- Fitment Type: Direct Replacement
- Part Description: 2007 Chevrolet Malibu Molding Asm-Windshield Side Upper Garnish *Light Ttnum
Vehicle Fitment- 2007 Chevrolet Malibu | Classic LS, Classic LT, LS, LT, LTZ, Maxx LS, Maxx LT, Maxx LTZ, Maxx SS, SS | 4 Cyl 2.2 L GAS, 6 Cyl 3.5 L GAS, 6 Cyl 3.9 L GAS
OEM (Genuine) 2007 Chevrolet Malibu Molding Asm-Windshield Side Upper Garnish *Neutral L
PartNumber: 22735733 Product Specifications
- Notes: Sedan, Neutral; Wagon, Neutral
- Location: Passenger Side
- Other Names: Weatherstrip Pillar Trim
- Item Dimensions: 28.5 x 5.6 x 4.1 inches
- Item Weight: 0.80 Pounds
- Fitment Type: Direct Replacement
- Part Description: 2007 Chevrolet Malibu Molding Asm-Windshield Side Upper Garnish *Neutral L
Vehicle Fitment- 2007 Chevrolet Malibu | Base, Classic LS, Classic LT, LS, LT, LTZ, Maxx, Maxx LS, Maxx LT, Maxx LTZ, Maxx SS, SS | 4 Cyl 2.2 L GAS, 6 Cyl 3.5 L GAS, 6 Cyl 3.9 L GAS
FAQ for Pillar Panels Repair
Q: How do I install the Front Side Door Trim Panel?
A:
Start with installing the luggage compartment release switch, the door trim fasteners, and the door trim. Then install the fastener cover.
By Bob
GM Specialist
27/03/2022Q: How do I install the front side door water deflector?
A:
Insert the lock knob through the holding of the water deflector. Route the electrical connectors through the existing holes in the water deflector. Secure the water to the door deflector, start at the bottom center, and move upward to the right. Lastly, install the door panel.
By Bob
GM Specialist
27/03/2022Q: How do I remove the Front Side Door Trim Panel?
A:
Start with releasing the tabs and pushing the door handle bezel from the door trim panel. Remove the door trim fastener cover and remove the fasteners, remove the door trim, and the luggage compartment release switch from the door trim.
By Omar
GM Specialist
25/03/2022Q: How do I remove the front side door water deflector?
A:
Start with removing the front door trim panel and then the front side door water deflector. Start at the top when removing.
By Omar
GM Specialist
25/03/2022Q: How do you install the front door trim plate?
A:
You can install the door lock switch, connect the electrical connector, and install the door trim panel.
By Omar
GM Specialist
24/03/2022Q: How do you install the rear door switch bezel?
A:
You can install the switches, and connect the electrical connectors, the switch bezel, and the door trim panels.
By Omar
GM Specialist
23/03/2022Q: How do you install the rear door trim plate?
A:
You can install the door handle bezel and the door trim panel.
By Bob
GM Specialist
23/03/2022Q: How do you install the upper extension trim panel?
A:
You can connect the electrical connector, the trim panel extension, and the door trim panel.
By Omar
GM Specialist
23/03/2022Q: How do you remove the upper extension trim panel?
A:
You can remove the upper trim panel extension and slide the extension off.
By Omar
GM Specialist
22/03/2022Q: How do you replace the upper extension trim panel?
A:
You can remove the trim panel extension from the door, pull it straight off, and then install the trim panel extension to the door.
By Bob
GM Specialist
22/03/2022See more FAQs (17)


