< Back ×
My Vehicle Change Vehicle
2006 GMC Yukon
< Back to View All
Interior & Exterior Trim
- Department
- Brands
- Prices
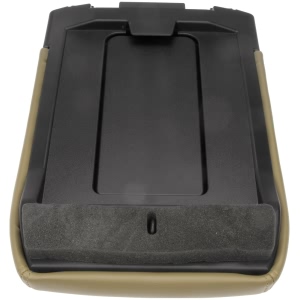

Dorman® OE Solutions Center Console Door Kit for 2006 GMC Yukon
PartNumber: 924-812Product Specifications- Notes: Tan; Lid Kit; Front Row; w/Split Bench Seat;Lid Kit; Front Row; Split Bench; Tan
- Color/Finish: Tan
- Material: Plastic Vinyl
- OE Part Number: 19127366
- Package Contents: 1 Kit, 1 Installation Hardware
- UPC: 019495562153
- Part Description: 2006 GMC Yukon OE Solutions Center Console Door Kit
Vehicle Fitment- 2006 GMC Yukon | All Trims | All Engines
- 2006 GMC Yukon | Denali | All Engines
$100.24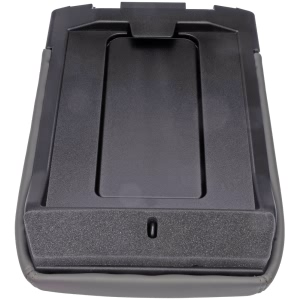

Dorman® OE Solutions Center Console Door Kit for 2006 GMC Yukon
PartNumber: 924-811Product Specifications- Notes: Dark Gray; Lid Kit; Front Row; w/Split Bench Seat;Lid Kit; Front Row; Split Bench; Dark Gray
- OE Part Number: 19127364
- Package Contents: 1 Kit; 1 Installation Hardware
- UPC: 019495562146
- Part Description: 2006 GMC Yukon OE Solutions Center Console Door Kit
Vehicle Fitment- 2006 GMC Yukon | All Trims | All Engines
- 2006 GMC Yukon | Denali | All Engines
$109.52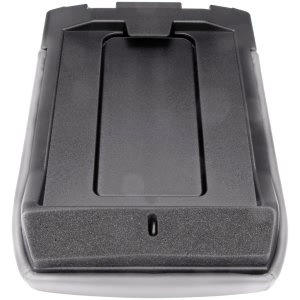

Dorman® OE Solutions Center Console Door Kit for 2006 GMC Yukon
PartNumber: 924-813Product Specifications- Notes: Light Gray; Lid Kit; Front Row; w/Split Bench Seat;Lid Kit; Front Row; Split Bench; Light Gray
- Color/Finish: Light Gray
- Material: Plastic Vinyl
- OE Part Number: 19127365
- Package Contents: 1 Kit, 1 Installation Hardware
- UPC: 019495726241
- Part Description: 2006 GMC Yukon OE Solutions Center Console Door Kit
Vehicle Fitment- 2006 GMC Yukon | All Trims | All Engines
- 2006 GMC Yukon | Denali | All Engines
$76.10OEM (Genuine) 2006 GMC Yukon Console, Front Floor *Neutral
PartNumber: 88987011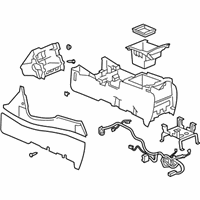 Product Specifications
- Notes: 2003-06 Denali, Escalade, Denali, Neutral
- Other Names: Console Assembly
- Item Dimensions: 65.1 x 29.8 x 27.7 inches
- Item Weight: 38.40 Pounds
- Fitment Type: Direct Replacement
- Part Description: 2006 GMC Yukon Console, Front Floor *Neutral
Vehicle Fitment- 2006 GMC Yukon | Denali | 8 Cyl 6.0 L GAS
OEM (Genuine) 2006 GMC Yukon Console, Front Floor *Pewter
PartNumber: 88987012 Product Specifications
- Notes: 2003-06 Denali, Escalade, Denali, Pewter
- Other Names: Console Assembly
- Item Dimensions: 64.3 x 20.9 x 25.5 inches
- Item Weight: 40.70 Pounds
- Fitment Type: Direct Replacement
- Part Description: 2006 GMC Yukon Console, Front Floor *Pewter
Vehicle Fitment- 2006 GMC Yukon | Denali | 8 Cyl 6.0 L GAS
OEM (Genuine) 2006 GMC Yukon Compartment Asm, Front Floor *Neutral
PartNumber: 88986696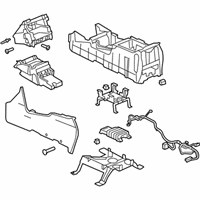 Product Specifications
- Notes: 2003-06 Tahoe, Yukon, Neutral
- Other Names: Console Assembly
- Item Dimensions: 63.2 x 29.0 x 27.4 inches
- Item Weight: 43.90 Pounds
- Fitment Type: Direct Replacement
- Replaces: 88986699
- Part Description: 2006 GMC Yukon Compartment Asm, Front Floor *Neutral
Vehicle Fitment- 2006 GMC Yukon | SL, SLE, SLT | 8 Cyl 4.8 L GAS, 8 Cyl 5.3 L FLEX, 8 Cyl 5.3 L GAS
OEM (Genuine) 2006 GMC Yukon Compartment Asm, Front Floor *Pewter
PartNumber: 88986697 Product Specifications
- Notes: 2003-06 Tahoe, Yukon, Pewter
- Other Names: Console Assembly
- Item Dimensions: 65.1 x 29.6 x 27.7 inches
- Item Weight: 45.10 Pounds
- Fitment Type: Direct Replacement
- Part Description: 2006 GMC Yukon Compartment Asm, Front Floor *Pewter
Vehicle Fitment- 2006 GMC Yukon | SL, SLE, SLT | 8 Cyl 4.8 L GAS, 8 Cyl 5.3 L FLEX, 8 Cyl 5.3 L GAS
OEM (Genuine) 2006 GMC Yukon Console Assembly
PartNumber: 88986667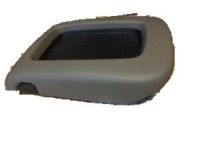 Product Specifications
- Notes: 2003-06 Tahoe, Yukon, Pewter
- Other Names: Console Assembly, Cover, Door, Rear Cover
- Item Dimensions: 18.4 x 17.3 x 3.1 inches
- Item Weight: 3.90 Pounds
- Fitment Type: Direct Replacement
- Replaces: 88986700
- Part Description: 2006 GMC Yukon Console Assembly
Vehicle Fitment- 2006 GMC Yukon | SL, SLE, SLT | 8 Cyl 4.8 L GAS, 8 Cyl 5.3 L FLEX, 8 Cyl 5.3 L GAS
FAQ for Center Console Repair
Q: What is the removal procedure for the bezel in the floor console (Luxury Upper)?
A:
You need to remove the I/P cluster bezel, insert a flat-bladed tool between the Bezel assembly and the console, pry the bezel from the console outwards partially to gain access to the connectors, disconnect the electrical connectors, and remove the bezel from the console.
By Bob
GM Specialist
01/11/2022Q: What is the removal procedure for the console (W/Console Mounting Bracket)?
A:
You need to remove both front seats, the radio amp fuse, the upper console bezel, the cupholder, and the screws retaining the console to the I/P, disconnect the wire connectors, and remove the console assembly and the rear seat audio control.
By Bob
GM Specialist
01/11/2022Q: What is the removal procedure for the center console end panel?
A:
You need to remove the storage bin, the rear cupholder, the 2 retaining screws, and the top 2 retaining screws, move the end panel rearwards to gain access to the electrical connectors, remove the end panel, the rear seat heater switch, the rear seat audio controls, and the power outlets.
By Bob
GM Specialist
01/11/2022Q: What is the removal procedure for the console (without the console mounting bracket)?
A:
You need to remove the radio amp fuse located, the floor console bezel, the cupholder, the bolts retaining the console to the I/P, the console storage bin, the center console end panel, and the 4 screws retaining the upper console bracket to the lower console bracket, move both front seats to the full forward, reposition the inboard seat track trim to gain access to the rear console side panel screw, remove both rear console side panel screws, move both front seats to the fully rearward, remove both front console side panel screws, disconnect the floor console electrical connector, and remove the console assembly.
By Bob
GM Specialist
01/11/2022Q: How to install the blower of the cupholder in the front floor console?
A:
You need to install the connector, slide the blower assembly down, install the blower assembly, the 2 retaining screws, and the console cup holder assembly.
By Bob
GM Specialist
01/11/2022Q: What is the recommended torque for 2 top retaining screws?
A:
The recommended torque is 1.6 Nm (14 lb in).
By Bob
GM Specialist
01/11/2022Q: What is the removal procedure for the bracket on the console floor?
A:
You need to remove both front seats, the upper console bezel, the cupholder, and the screws retaining the console to the I/P, move the console assembly rearwards to disconnect the wire connectors, remove the console assembly, the console bin, the amplifier and bracket, the vehicle sensor and the fasteners retaining the console to the bracket.
By Bob
GM Specialist
01/11/2022Q: What is the removal procedure for the console storage bin (Expect Pro)?
A:
You need to remove the console compartment door, the bin retaining screws, the 4 lower bolts, and the storage bin from the console.
By Bob
GM Specialist
01/11/2022Q: What is the removal procedure for the console (W/o Console Mounting Bracket)?
A:
You need to remove the radio amp fuse, the floor console bezel, the cupholder, the bolts retaining the console to the I/P, the console storage bin, the center console end panel, and the 4 screws retaining the upper console bracket to the lower console bracket, move both front seats to the full forward, reposition the inboard seat track trim to gain access to the rear console side panel screw, remove both rear console side panel screws, move both front seats to the fully rearward, remove both front console side panel screws, disconnect the floor console electrical connector, and remove the console assembly.
By Bob
GM Specialist
01/11/2022Q: What is the removal procedure for the console in the overhead?
A:
You need to remove the console roof screw, disconnect the electrical connectors, and remove the console.
By Bob
GM Specialist
01/11/2022See more FAQs (20)

