< Back ×
My Vehicle Change Vehicle
2006 Chevrolet Monte Carlo
< Back to View All
Door Handles, Locks & Related Parts
- Department
- Prices
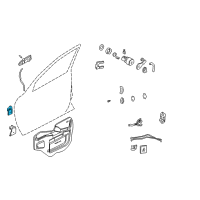
OEM (Genuine) 2006 Chevrolet Monte Carlo Upper Hinge
PartNumber: 10304599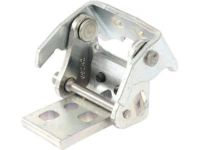 Product Specifications
- Location: Driver Side; Passenger Side
- Other Names: Lower Hinge, Upper Hinge
- Item Dimensions: 9.5 x 6.2 x 6.2 inches
- Item Weight: 2.20 Pounds
- Fitment Type: Direct Replacement
- Replaces: 10425263, 12533547
- Part Description: 2006 Chevrolet Monte Carlo Upper Hinge
Vehicle Fitment- 2006 Chevrolet Monte Carlo | LS, LS Competition, LS Sport, LT, LTZ, SS, SS 35th Anniversary Edition, SS Dale Earnhardt Signature Edition, SS High Sport, SS Pace Car | 6 Cyl 3.4 L GAS, 6 Cyl 3.5 L FLEX, 6 Cyl 3.5 L GAS, 6 Cyl 3.8 L GAS, 6 Cyl 3.9 L GAS, 8 Cyl 5.3 L GAS
$11.83 MSRP:$17.84You Save: $6.01 (34%)OEM (Genuine) 2006 Chevrolet Monte Carlo Upper Hinge
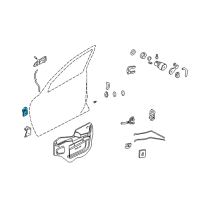
PartNumber: 10304598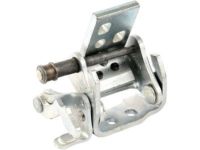 Product Specifications
- Location: Driver Side; Passenger Side
- Other Names: Lower Hinge, Upper Hinge
- Item Dimensions: 9.5 x 8.2 x 6.1 inches
- Item Weight: 3.20 Pounds
- Fitment Type: Direct Replacement
- Replaces: 12533546, 10425262
- Part Description: 2006 Chevrolet Monte Carlo Upper Hinge
Vehicle Fitment- 2006 Chevrolet Monte Carlo | LS, LS Competition, LS Sport, LT, LTZ, SS, SS 35th Anniversary Edition, SS Dale Earnhardt Signature Edition, SS High Sport, SS Pace Car | 6 Cyl 3.4 L GAS, 6 Cyl 3.5 L FLEX, 6 Cyl 3.5 L GAS, 6 Cyl 3.8 L GAS, 6 Cyl 3.9 L GAS, 8 Cyl 5.3 L GAS
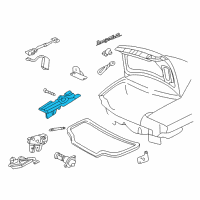
OEM (Genuine) 2006 Chevrolet Monte Carlo Hinge Asm-Rear Compartment Lid
PartNumber: 10382577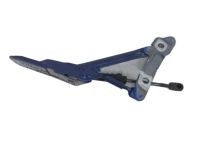 Product Specifications
- Location: Driver Side
- Other Names: Hinge
- Item Dimensions: 16.0 x 4.4 x 4.3 inches
- Item Weight: 1.70 Pounds
- Fitment Type: Direct Replacement
- Replaces: 10426520, 10342703
- Part Description: 2006 Chevrolet Monte Carlo Hinge Asm-Rear Compartment Lid
Vehicle Fitment- 2006 Chevrolet Monte Carlo | LS, LS Competition, LS Sport, LT, LTZ, SS, SS 35th Anniversary Edition, SS Dale Earnhardt Signature Edition, SS High Sport, SS Pace Car | 6 Cyl 3.4 L GAS, 6 Cyl 3.5 L FLEX, 6 Cyl 3.5 L GAS, 6 Cyl 3.8 L GAS, 6 Cyl 3.9 L GAS, 8 Cyl 5.3 L GAS
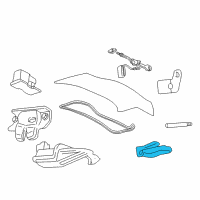
OEM (Genuine) 2006 Chevrolet Monte Carlo Hinge Asm-Rear Compartment Lid
PartNumber: 10382576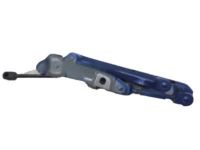 Product Specifications
- Location: Passenger Side
- Other Names: Hinge
- Item Dimensions: 16.1 x 4.5 x 4.4 inches
- Item Weight: 1.70 Pounds
- Fitment Type: Direct Replacement
- Replaces: 10426519, 10342702
- Part Description: 2006 Chevrolet Monte Carlo Hinge Asm-Rear Compartment Lid
Vehicle Fitment- 2006 Chevrolet Monte Carlo | LS, LS Competition, LS Sport, LT, LTZ, SS, SS 35th Anniversary Edition, SS Dale Earnhardt Signature Edition, SS High Sport, SS Pace Car | 6 Cyl 3.4 L GAS, 6 Cyl 3.5 L FLEX, 6 Cyl 3.5 L GAS, 6 Cyl 3.8 L GAS, 6 Cyl 3.9 L GAS, 8 Cyl 5.3 L GAS
FAQ for Door Hinge Repair
Q: What is the removal procedure for the front door hinge spring?
A:
The procedure is to open the door, remove the door hinge spring from the door hinge and remove the door hinge spring from the vehicle.
By Bob
GM Specialist
01/11/2022Q: How do you install the front door hinge spring?
A:
You can install the door hinge spring to the door hinge and close the door.
By Bob
GM Specialist
01/11/2022Q: How do you install the front door hinge?
A:
You can position the body side hinge to the alignment marks, install the bolts to the body side hinge, position the door side hinge to the body side hinge, install the intermediate hinge bolts, install the door side hinge bolts, remove the door support and inspect the door for proper operation and alignment.
By Bob
GM Specialist
01/11/2022Q: What is the removal procedure for the front door hinge?
A:
The procedure is to open the front door, support the front door, remove the intermediate hinge bolts, move the door, clean the mounting surfaces of the hinges, mark the front door hinge locations on each surface, remove the bolts from the front door side hinge, remove the door side hinge, remove the bolts from the body side hinge and remove the body side hinge.
By Bob
GM Specialist
01/11/2022Q: What is the removal procedure for the door striker anchor plate?
A:
The procedure is to remove the front or rear door lock pillar trim, mark the position of the striker with a grease pencil, remove the screws, remove the striker and the shims and remove the anchor plate.
By Bob
GM Specialist
29/10/2022Q: What is the recommended torque when you readjust the door striker?
A:
You can tighten the door striker screws to 25 Nm (18 lb-ft).
By Bob
GM Specialist
29/10/2022Q: How do you install the door striker anchor plate?
A:
You can install the anchor plate, the door lock shims, and the striker, install the striker screws, align the door lock striker to the alignment marks, tighten the door lock striker screws, adjust the door lock striker and install the front and/or rear trim.
By Bob
GM Specialist
29/10/2022Q: What is the adjustment procedure for the door lock striker (Monte Carlo)?
A:
The procedure is to open the door, loosen the door striker screws, adjust the door striker up or down and inboard or outboard, apply modeling clay or body caulking compound to the door lock opening, close the door, open the door, check the door striker impression in the modeling clay or body caulking compound, readjust the door striker and close the door.
By Bob
GM Specialist
29/10/2022See more FAQs (3)

