< Back ×
My Vehicle Change Vehicle
2005 Buick Rainier
< Back to View All
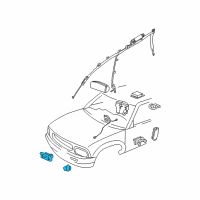
Air Bag
- Department
- Prices
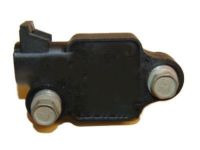
OEM (Genuine) 2005 Buick Rainier Side Sensor
PartNumber: 15077445 Product Specifications
- Location: Driver Side; Passenger Side
- Other Names: Front Impact Sensor, Front Sensor
- Item Dimensions: 3.1 x 2.2 x 2.1 inches
- Item Weight: 0.40 Pounds
- Fitment Type: Direct Replacement
- Part Description: 2005 Buick Rainier Side Sensor
Vehicle Fitment- 2005 Buick Rainier | CXL, CXL Plus | 6 Cyl 4.2 L GAS, 8 Cyl 5.3 L GAS
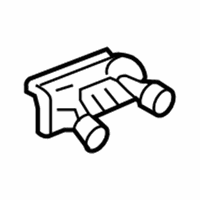
OEM (Genuine) 2005 Buick Rainier Side Sensor
PartNumber: 15077444 Product Specifications
- Location: Driver Side; Passenger Side
- Other Names: Side Impact Sensor, Side Sensor
- Item Dimensions: 3.4 x 3.1 x 3.2 inches
- Item Weight: 0.50 Pounds
- Fitment Type: Direct Replacement
- Part Description: 2005 Buick Rainier Side Sensor
Vehicle Fitment- 2005 Buick Rainier | CXL, CXL Plus | 6 Cyl 4.2 L GAS, 8 Cyl 5.3 L GAS
FAQ for Air Bag Sensor Repair
Q: How to describe the side supplemental inflatable restraint (SIR) system?
A:
The roof rail modules (front) are located in the headliner along the roof rails and the roof rail modules contain a housing, inflatable airbag, initiating device, and a canister of gas-generating material. The initiator is part of the roof rail module deployment loop. When a side impact of sufficient force occurs the inflatable restraint side impact sensors (SIS) detects the impact and sends a signal to the inflatable restraint sensing and diagnostic module (SDM). The SDM compares the signal received from the SIS to a value stored in memory. When the generated signal exceeds the stored value, the SDM will cause current to flow through the side deployment loop deploying the roof rail airbag.
By Bob
GM Specialist
01/11/2022Q: What do we need to note when we repair and inspect after an accident with or without inflatable module deployment?
A:
Proper operation of the supplemental inflatable restraint (SIR) sensing system requires that any repairs to the vehicle structure return the vehicle structure to the original production configuration and not properly repairing the vehicle structure could cause non-deployment in a collision or deployment for conditions less severe than intended. After any collision, you should inspect the components and if you detect any damage, you should replace the component. If you detect any damage to the mounting points or mounting hardware, you should repair or replace the mounting points and mounting hardware as needed.
By Bob
GM Specialist
01/11/2022Q: How to remove the Inflatable Restraint Side Impact Module - Front?
A:
You should disable the Supplemental Inflatable Restraint (SIR) system, remove the seat assembly from the vehicle, the seat trim panel, the seat back cover and pad, the front seat back panel, the push pin securing the top of the seat belt retractor assembly to the seat back frame and the 2 screws that secure the inflatable side impact module to the seat back frame, disconnect the SIR wiring harness from the module, remove the side impact module and fully deploy the module before disposal.
By Bob
GM Specialist
01/11/2022Q: What is the recommended torque for the screws?
A:
The recommended torque is 10 Nm (88 lb in).
By Bob
GM Specialist
01/11/2022Q: How to install the Inflatable Restraint Vehicle Rollover Sensor?
A:
You should connect the electrical connectors and install the nuts securing the rollover sensor to the floor panel and rear carpet.
By Bob
GM Specialist
01/11/2022Q: How to install the Inflatable Restraint Side Impact Sensor?
A:
You should remove any dirt, grease, or other impurities from the mounting surface, position the side impact sensor horizontally to the door, connect the electrical connector to the side impact sensor, install the screws which retain the side impact sensor to the door, fully seat the water deflector to the door, install the door trim panel and enable the SIR system.
By Bob
GM Specialist
01/11/2022Q: How to remove the Inflatable Restraint Side Impact Sensor?
A:
You should disable the supplemental inflatable restraint (SIR) system, remove the front door trim panel, peel the rear half of the water deflector away from the door to access the side impact sensor, remove the screws that retain the side impact sensor to the door, disconnect the impact sensor electrical connector from the side impact sensor and remove the side impact sensor from the door.
By Bob
GM Specialist
01/11/2022Q: How to remove the Inflatable Restraint Vehicle Rollover Sensor?
A:
You should fold back the rear carpet to gain access to the sensor, disconnect the electrical connector and remove the nuts securing the rollover sensor to the floor panel.
By Bob
GM Specialist
01/11/2022Q: How to remove the Inflatable Restraint Front End Sensor?
A:
You should disable the supplemental inflatable restraint (SIR) system, remove the grille and the headlamp wire harness from the retaining clip, raise and support the headlamp wire harness to gain access to the front-end sensor, loosen the bolts retaining the sensor to the frame, remove the sensor assembly from the frame, position the sensor assembly above the front bumper, remove the retaining bolts and protective cover from the sensor and the connector-position assurance (CPA) from the sensor electrical connector, disconnect the sensor electrical connector and remove the sensor from the vehicle.
By Bob
GM Specialist
01/11/2022Q: How to service the supplemental inflatable restraint (SIR) Enabling Zone 3?
A:
You should remove the key from the ignition, connect the steering wheel module yellow 4-way connector, install the connector position assurance to the steering wheel module yellow 4-way connector located left of the steering column near the knee bolster and the supplemental inflatable restraint fuse to the fuse block located in the underhood fuse block, stay well away from all airbags, turn on the ignition, with the engine off, make sure that the airbag indicator will flash 7 times and the airbag indicator will then turn off and perform the diagnostic system check-vehicle in vehicle DTC information if the airbag indicator does not operate as described.
By Bob
GM Specialist
28/10/2022See more FAQs (14)


