< Back ×
My Vehicle Change Vehicle
2005 Buick Park Avenue
< Back to View All
Interior & Exterior Trim
- Department
- Prices
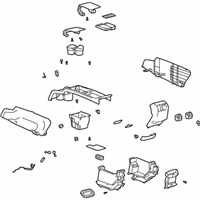
OEM (Genuine) 2005 Buick Park Avenue Console Asm, Front Floor
PartNumber: 88987041 Product Specifications
- Notes: 2002-05, Shale
- Other Names: Console Assembly
- Item Dimensions: 41.1 x 16.2 x 12.9 inches
- Item Weight: 40.20 Pounds
- Fitment Type: Direct Replacement
- Part Description: 2005 Buick Park Avenue Console Asm, Front Floor
Vehicle Fitment- 2005 Buick Park Avenue | Base, Ultra | 6 Cyl 3.8 L GAS
OEM (Genuine) 2005 Buick Park Avenue Console Asm, Front Floor *Cashmere
PartNumber: 89039794 Product Specifications
- Notes: 2002-05, Cashmere
- Other Names: Console Assembly
- Item Dimensions: 40.6 x 10.4 x 19.7 inches
- Item Weight: 16.50 Pounds
- Fitment Type: Direct Replacement
- Part Description: 2005 Buick Park Avenue Console Asm, Front Floor *Cashmere
Vehicle Fitment- 2005 Buick Park Avenue | Base, Ultra | 6 Cyl 3.8 L GAS
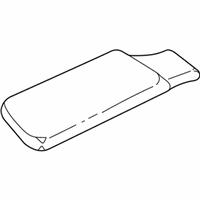
OEM (Genuine) 2005 Buick Park Avenue Lid
PartNumber: 12533245 Product Specifications
- Notes: Armrest, Cloth, Gray
- Other Names: Lid
- Fitment Type: Direct Replacement
- Part Description: 2005 Buick Park Avenue Lid
Vehicle Fitment- 2005 Buick Park Avenue | Base, Ultra | 6 Cyl 3.8 L GAS
OEM (Genuine) 2005 Buick Park Avenue CONSOLE, Floor Console
PartNumber: 88892589 Product Specifications
- Notes: 2002-05, Gray
- Other Names: Console Assembly
- Fitment Type: Direct Replacement
- Part Description: 2005 Buick Park Avenue CONSOLE, Floor Console
Vehicle Fitment- 2005 Buick Park Avenue | Base, Ultra | 6 Cyl 3.8 L GAS
OEM (Genuine) 2005 Buick Park Avenue LID, Front Seat Arm Rest
PartNumber: 88952088 Product Specifications
- Notes: Armrest, Cloth, Shale
- Other Names: Lid
- Item Dimensions: 17.3 x 6.2 x 3.7 inches
- Item Weight: 3.30 Pounds
- Fitment Type: Direct Replacement
- Part Description: 2005 Buick Park Avenue LID, Front Seat Arm Rest
Vehicle Fitment- 2005 Buick Park Avenue | Base, Ultra | 6 Cyl 3.8 L GAS
FAQ for Center Console Repair
Q: How to remove the Trim Plate-Console Rear?
A:
First, you need to partially remove the rear console panel to allow access to the rear air deflector control linkage. Then, please disengage the retainers, release the linkage, and remove the rear trim panel. Finally, you should remove the air deflectors from the rear trim panel and allow for access to the rear air deflector control linkage on installation.
By Bob
GM Specialist
01/11/2022Q: How to remove the Console?
A:
First, you need to raise the seat to the full-up position and remove the rear air deflector. Then, please remove the fasteners that retain the armrest to the seat frame.
By Bob
GM Specialist
01/11/2022Q: How to remove the Door-Console Compartment Center?
A:
First, you need to open the console center door. Then, please remove the fasteners that secure the console center door to the hinge. Finally, you should remove the console center door from the console.
By Bob
GM Specialist
01/11/2022Q: How to install the Trim Plate-Console Rear?
A:
First, you need to align the rear console trim panel to the console and push inward to engage the retainers. Then, please through the air deflector openings fasten the rear air deflector control linkage to the control knob. Finally, you should install air deflectors.
By Bob
GM Specialist
01/11/2022Q: How to install the Trim Plate-Console Front?
A:
First, you need to connect the electrical connector. Then, please align the retaining clips on the trim panel with the console. Finally, you should push inward to secure the trim panel.
By Bob
GM Specialist
01/11/2022Q: How to remove the Trim Plate-Console Front?
A:
First, you need to pull outward on the front trim panel to release the retaining clips. Then, please disconnect the electrical connector and remove the trim panel.
By Bob
GM Specialist
01/11/2022Q: What is the recommended torque for the fasteners connecting the console floor bracket to the console?
A:
The recommended torque is 10 N.m (89 lb in).
By Bob
GM Specialist
01/11/2022Q: How to install the Bracket-Console Floor?
A:
First, you need to install the console floor bracket to the floor and install the fasteners. Then, please install the console.
By Bob
GM Specialist
01/11/2022Q: How to install the Console Storage Bin?
A:
First, you need to install the storage bin into the console and connect the electrical connector. Then, please install the fasteners in the storage bin and install the rear duct to the console. Finally, you should install the rear console trim panel, the rear console door, and the console center door.
By Bob
GM Specialist
01/11/2022Q: How to remove the Compartment and UGDO-Overhead?
A:
First, you need to remove the lens and the cover, disconnect the electrical connectors, and remove the reflector assembly. Then, please disconnect the 2 electrical connectors from the lamp switches, remove the 2 fasteners from the front of the assembly, and release the 2 tabs from the front of the assembly. Finally, you should reach through the opening, lower the overhead compartment assembly, remove the switches from the assembly, and remove the overhead assembly.
By Bob
GM Specialist
01/11/2022See more FAQs (11)


