< Back ×
My Vehicle Change Vehicle
2005 Buick LeSabre
< Back to View All
Brake Pads, Discs & Calipers
- Department
- Brands
- Prices
OEM (Genuine) 2005 Buick LeSabre Front Brake Rotor Assembly
PartNumber: 19303832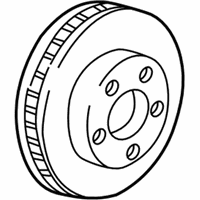 Product Specifications
- Notes: W/16" Wheel
- Location: Driver Side; Passenger Side
- Other Names: Rotor
- Item Dimensions: 13.0 x 12.7 x 3.4 inches
- Item Weight: 21.20 Pounds
- Fitment Type: Direct Replacement
- Replaces: 88964116
- Part Description: 2005 Buick LeSabre Front Brake Rotor Assembly
Vehicle Fitment- 2005 Buick LeSabre | Custom, Limited | 6 Cyl 3.8 L GAS
$46.82 MSRP:$146.71You Save: $99.89 (69%)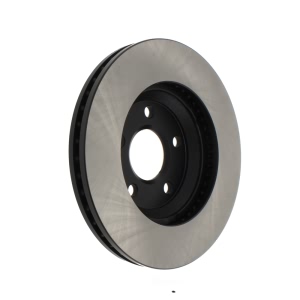

Centric® Premium Vented Front Brake Rotor for 2005 Buick LeSabre
PartNumber: 120.62087Product Specifications- Notes: 16" Wheels
- UPC: 805890313243
- Part Description: 2005 Buick LeSabre Premium Vented Front Brake Rotor
Vehicle Fitment- 2005 Buick LeSabre | All Trims | All Engines
$52.90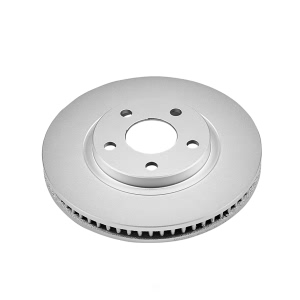

Power Stop® PowerStop Evolution Coated Rotor for 2005 Buick LeSabre
PartNumber: AR8255EVCProduct Specifications- Notes: w/12-inch front rotors; to VIN 129025
- Bolt Circle: 115mm (4.53")
- Hub Hole Diameter: 70.7mm (2.78")
- Lug Holes Quantity: 5
- Lug Holes Size: 16.26mm (0.64")
- Minimum Thickness: 30.8mm (1.21")
- Nominal Thickness: 32.3mm (1.27")
- Quantity: 1 Per Pack
- Rotor Construction: 1-Piece
- Rotor Design: Rotors Only
- Rotor Diameter: 303mm (11.93")
- Rotor Height: 51.8mm (2.04")
- Rotor Style: Plain
- Part Description: 2005 Buick LeSabre PowerStop Evolution Coated Rotor
Vehicle Fitment- 2005 Buick LeSabre | All Trims | All Engines
$55.01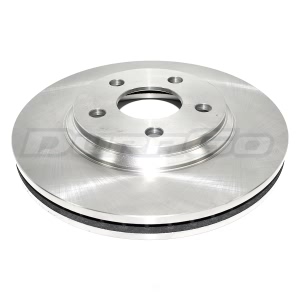

DuraGo® Vented Front Brake Rotor for 2005 Buick LeSabre
PartNumber: BR900312Product Specifications- Notes: 16" Whls; From VIN# 129026
- Bolt Circle: 118mm (4.65")
- Center Hole Diameter: 70.7mm (2.78")
- Lug Holes Quantity: 5
- Lug Holes Size: 16.2mm (0.64")
- Minimum Thickness: 28.6mm (1.13")
- Nominal Thickness: 30mm (1.18")
- Quantity: 1 Per Pack
- Rotor Construction: 1-Piece
- Rotor Design: Rotors Only
- Rotor Diameter: 303mm (11.93")
- Rotor Height: 50.8mm (2")
- Rotor Style: Plain
- Rotor Vane Type: Non-Directional
- UPC: 756632160819
- Part Description: 2005 Buick LeSabre Vented Front Brake Rotor
Vehicle Fitment- 2005 Buick LeSabre | All Trims | All Engines
$38.81

Centric® GCX Rotor With Partial Coating for 2005 Buick LeSabre
PartNumber: 320.62087Product Specifications- Notes: 16" Wheels
- UPC: 889590301854
- Part Description: 2005 Buick LeSabre GCX Rotor With Partial Coating
Vehicle Fitment- 2005 Buick LeSabre | All Trims | All Engines
$45.88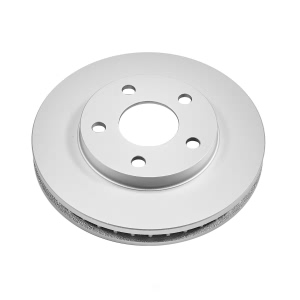

Power Stop® PowerStop Evolution Coated Rotor for 2005 Buick LeSabre
PartNumber: AR8250EVCProduct Specifications- Notes: w/11-inch front rotors
- Bolt Circle: 118mm (4.65")
- Hub Hole Diameter: 70.5mm (2.78")
- Lug Holes Quantity: 5
- Lug Holes Size: 13.97mm (0.55")
- Minimum Thickness: 30.6mm (1.2")
- Nominal Thickness: 32.3mm (1.27")
- Quantity: 1 Per Pack
- Rotor Construction: 1-Piece
- Rotor Design: Rotors Only
- Rotor Diameter: 278mm (10.94")
- Rotor Height: 52mm (2.05")
- Rotor Style: Plain
- Part Description: 2005 Buick LeSabre PowerStop Evolution Coated Rotor
Vehicle Fitment- 2005 Buick LeSabre | All Trims | All Engines
$44.21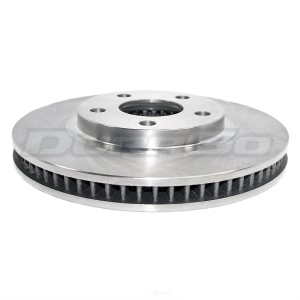

DuraGo® Vented Front Brake Rotor for 2005 Buick LeSabre
PartNumber: BR55034Product Specifications- Notes: 16" Whls; To VIN# 129025
- Bolt Circle: 118mm (4.65")
- Center Hole Diameter: 70.7mm (2.78")
- Lug Holes Quantity: 5
- Lug Holes Size: 16mm (0.63")
- Minimum Thickness: 30.7mm (1.21")
- Nominal Thickness: 32.3mm (1.27")
- Quantity: 1 Per Pack
- Rotor Construction: 1-Piece
- Rotor Design: Rotors Only
- Rotor Diameter: 302.6mm (11.91")
- Rotor Height: 51.9mm (2.04")
- Rotor Style: Plain
- Rotor Vane Type: Non-Directional
- UPC: 756632111231
- Part Description: 2005 Buick LeSabre Vented Front Brake Rotor
Vehicle Fitment- 2005 Buick LeSabre | All Trims | All Engines
$31.28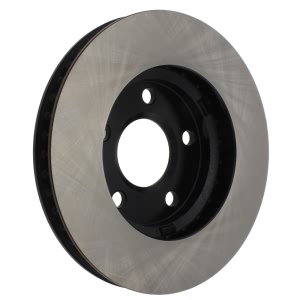

Centric® Premium Vented Front Brake Rotor for 2005 Buick LeSabre
PartNumber: 120.62057Product Specifications- Notes: 15" Wheels
- UPC: 805890035602
- Part Description: 2005 Buick LeSabre Premium Vented Front Brake Rotor
Vehicle Fitment- 2005 Buick LeSabre | All Trims | All Engines
$36.23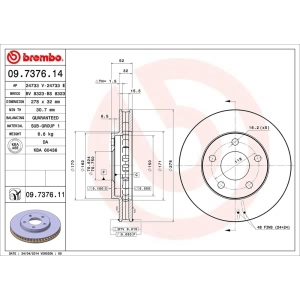

brembo® UV Coated Series Vented Front Brake Rotor for 2005 Buick LeSabre
PartNumber: 09.7376.11Product Specifications- Notes: 15" Wheels
- Center Diameter: 70.5
- Coated: UV Coated
- Diameter (mm): 278
- Height: 52
- Material: Grey Cast Iron
- Minimum Thickness (mm): 30.7
- Nominal Thickness (mm): 32
- Number of Holes: 5
- Quantity: 5
- Solid Or Vented Type Rotor: vented
- Part Description: 2005 Buick LeSabre UV Coated Series Vented Front Brake Rotor
Vehicle Fitment- 2005 Buick LeSabre | Custom | All Engines
- 2005 Buick LeSabre | Limited | All Engines
$60.95

Bosch® QuietCast™ Premium Rear Brake Rotor for 2005 Buick LeSabre
PartNumber: 25010549Product Specifications- Quantity: 1 Per Pack
- Rotor Construction: 1-Piece
- Rotor Design: Rotors Only
- Rotor Style: Plain
- UPC: 077212082865
- Part Description: 2005 Buick LeSabre QuietCast™ Premium Rear Brake Rotor
Vehicle Fitment- 2005 Buick LeSabre | All Trims | All Engines
$35.18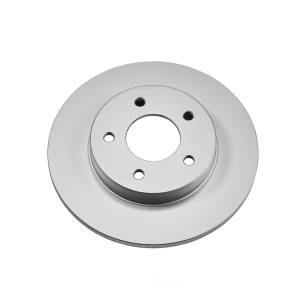

Power Stop® PowerStop Evolution Coated Rotor for 2005 Buick LeSabre
PartNumber: AR8245EVCProduct Specifications- Bolt Circle: 115mm (4.53")
- Hub Hole Diameter: 70.5mm (2.78")
- Lug Holes Quantity: 5
- Lug Holes Size: 12.95mm (0.51")
- Minimum Thickness: 9.5mm (0.37")
- Nominal Thickness: 10.9mm (0.43")
- Quantity: 1 Per Pack
- Rotor Construction: 1-Piece
- Rotor Design: Rotors Only
- Rotor Diameter: 281mm (11.06")
- Rotor Height: 38.4mm (1.51")
- Rotor Style: Plain
- Part Description: 2005 Buick LeSabre PowerStop Evolution Coated Rotor
Vehicle Fitment- 2005 Buick LeSabre | All Trims | All Engines
$33.13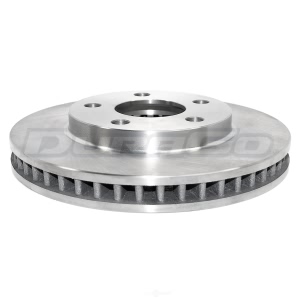

DuraGo® Vented Front Brake Rotor for 2005 Buick LeSabre
PartNumber: BR55036Product Specifications- Notes: 15 Inch Whls
- Bolt Circle: 118mm (4.65")
- Center Hole Diameter: 70.8mm (2.79")
- Lug Holes Quantity: 5
- Lug Holes Size: 16.1mm (0.63")
- Minimum Thickness: 30.7mm (1.21")
- Nominal Thickness: 32.2mm (1.27")
- Quantity: 1 Per Pack
- Rotor Construction: 1-Piece
- Rotor Design: Rotors Only
- Rotor Diameter: 278mm (10.94")
- Rotor Height: 52.1mm (2.05")
- Rotor Style: Plain
- Rotor Vane Type: Non-Directional
- UPC: 756632111248
- Part Description: 2005 Buick LeSabre Vented Front Brake Rotor
Vehicle Fitment- 2005 Buick LeSabre | All Trims | All Engines
$26.68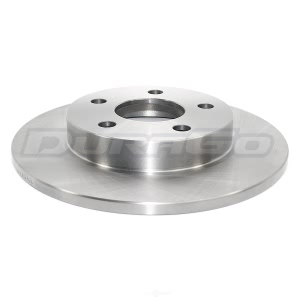

DuraGo® Solid Rear Brake Rotor for 2005 Buick LeSabre
PartNumber: BR55065Product Specifications- Bolt Circle: 118mm (4.65")
- Center Hole Diameter: 70.9mm (2.79")
- Lug Holes Quantity: 5
- Lug Holes Size: 16.4mm (0.65")
- Minimum Thickness: 9mm (0.35")
- Nominal Thickness: 11mm (0.43")
- Quantity: 1 Per Pack
- Rotor Construction: 1-Piece
- Rotor Design: Rotors Only
- Rotor Diameter: 281mm (11.06")
- Rotor Height: 38.8mm (1.53")
- Rotor Style: Plain
- Rotor Vane Type: Non-Directional
- UPC: 756632118025
- Part Description: 2005 Buick LeSabre Solid Rear Brake Rotor
Vehicle Fitment- 2005 Buick LeSabre | All Trims | All Engines
$20.75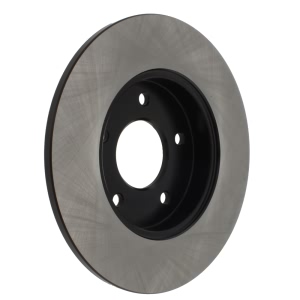

Centric® Premium Solid Rear Brake Rotor for 2005 Buick LeSabre
PartNumber: 120.62045Product Specifications- UPC: 805890042730
- Part Description: 2005 Buick LeSabre Premium Solid Rear Brake Rotor
Vehicle Fitment- 2005 Buick LeSabre | All Trims | All Engines
$28.93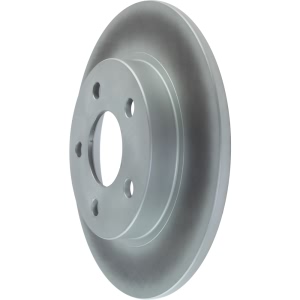

Centric® GCX Plain 1-Piece Rear Brake Rotor for 2005 Buick LeSabre
PartNumber: 320.62045Product Specifications- UPC: 889590252149
- Part Description: 2005 Buick LeSabre GCX Plain 1-Piece Rear Brake Rotor
Vehicle Fitment- 2005 Buick LeSabre | All Trims | All Engines
$24.20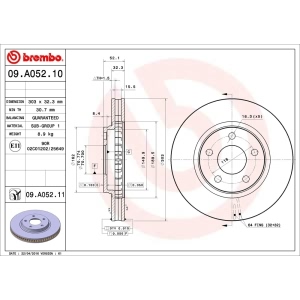

brembo® UV Coated Series Vented Front Brake Rotor for 2005 Buick LeSabre
PartNumber: 09.A052.11Product Specifications- Notes: 16" Wheels
- Coated: UV Coated
- Diameter (mm): 303
- Height: 52
- Material: Grey Cast Iron
- Minimum Thickness (mm): 30.7
- Nominal Thickness (mm): 32.3
- Number of Holes: 5
- Quantity: 5
- Solid Or Vented Type Rotor: vented
- Part Description: 2005 Buick LeSabre UV Coated Series Vented Front Brake Rotor
Vehicle Fitment- 2005 Buick LeSabre | Custom | All Engines
- 2005 Buick LeSabre | Limited | All Engines


Bosch® QuietCast™ Premium Vented Front Brake Rotor for 2005 Buick LeSabre
PartNumber: 25010529Product Specifications- Notes: w/15" Whls
- Quantity: 1 Per Pack
- Rotor Construction: 1-Piece
- Rotor Design: Rotors Only
- Rotor Style: Plain
- UPC: 077212082490
- Part Description: 2005 Buick LeSabre QuietCast™ Premium Vented Front Brake Rotor
Vehicle Fitment- 2005 Buick LeSabre | All Trims | All Engines
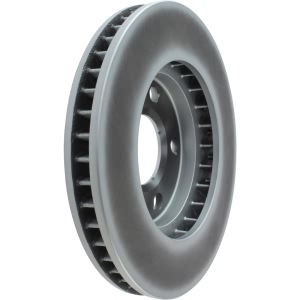

Centric® GCX Plain 1-Piece Front Brake Rotor for 2005 Buick LeSabre
PartNumber: 320.62057Product Specifications- Notes: 15" Wheels
- UPC: 889590252187
- Part Description: 2005 Buick LeSabre GCX Plain 1-Piece Front Brake Rotor
Vehicle Fitment- 2005 Buick LeSabre | All Trims | All Engines
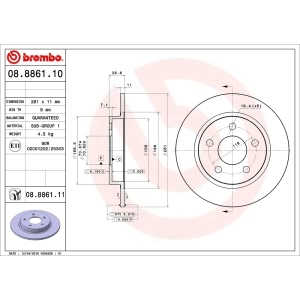

brembo® UV Coated Series Solid Rear Brake Rotor for 2005 Buick LeSabre
PartNumber: 08.8861.11Product Specifications- Coated: UV Coated
- Diameter (mm): 281
- Height: 39
- Material: Grey Cast Iron
- Minimum Thickness (mm): 9
- Nominal Thickness (mm): 11
- Number of Holes: 5
- Quantity: 5
- Solid Or Vented Type Rotor: solid
- Part Description: 2005 Buick LeSabre UV Coated Series Solid Rear Brake Rotor
Vehicle Fitment- 2005 Buick LeSabre | Custom | All Engines
- 2005 Buick LeSabre | Limited | All Engines
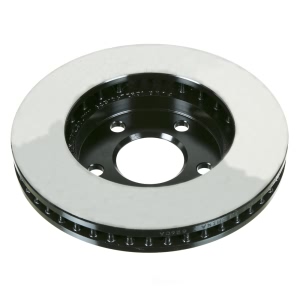

Wagner® Brake Rotor for 2005 Buick LeSabre
PartNumber: BD125507EProduct Specifications- Notes: 5 Stud Wheel;with 279mm Diameter Rotor;with Black E-Coat on non-braking surface to prevent rust and corrosion;15in Wheels
- Bolt Circle: 118mm (4.65")
- Lug Holes Quantity: 5
- Minimum Thickness: 30.7mm (1.21")
- Nominal Thickness: 32.26mm (1.27")
- Quantity: 1 Per Pack
- Rotor Construction: 1-Piece
- Rotor Design: Rotors Only
- Rotor Diameter: 277.65mm (10.93")
- Rotor Finish: With E-Shield™ Coating
- Rotor Height: 52.324mm (2.06")
- Rotor Material: Cast Iron
- Rotor Style: Plain
- UPC: 008536933601
- Part Description: 2005 Buick LeSabre Brake Rotor
Vehicle Fitment- 2005 Buick LeSabre | All Trims | All Engines
OEM (Genuine) 2005 Buick LeSabre Front Brake Rotor Assembly
PartNumber: 19303831 Product Specifications
- Notes: W/15" Wheel
- Location: Driver Side; Passenger Side
- Other Names: Brake Rotor, Rotor
- Item Dimensions: 13.6 x 12.8 x 3.5 inches
- Item Weight: 16.80 Pounds
- Fitment Type: Direct Replacement
- Replaces: 18060233, 18021359
- Part Description: 2005 Buick LeSabre Front Brake Rotor Assembly
Vehicle Fitment- 2005 Buick LeSabre | Custom, Limited | 6 Cyl 3.8 L GAS
OEM (Genuine) 2005 Buick LeSabre Rear Brake Rotor
PartNumber: 18060236 Product Specifications
- Location: Driver Side; Passenger Side
- Other Names: Rotor
- Item Dimensions: 13.8 x 12.8 x 3.8 inches
- Item Weight: 10.90 Pounds
- Fitment Type: Direct Replacement
- Replaces: 18022401
- Part Description: 2005 Buick LeSabre Rear Brake Rotor
Vehicle Fitment- 2005 Buick LeSabre | Custom, Limited | 6 Cyl 3.8 L GAS


Bosch® QuietCast™ Premium Front Brake Rotor for 2005 Buick LeSabre
PartNumber: 25011419Product Specifications- Notes: w/16 in Whls
- Quantity: 1 Per Pack
- Rotor Construction: 1-Piece
- Rotor Design: Rotors Only
- Rotor Style: Plain
- UPC: 077212085576
- Part Description: 2005 Buick LeSabre QuietCast™ Premium Front Brake Rotor
Vehicle Fitment- 2005 Buick LeSabre | All Trims | All Engines
OEM (Genuine) 2005 Buick LeSabre Rotor, Rear Brake
PartNumber: 18040482 Product Specifications
- Notes: Bonneville, Lesabre; W/Gxp Model
- Item Dimensions: 13.8 x 12.6 x 3.8 inches
- Item Weight: 11.60 Pounds
- Replaced by: 88967261
- Part Description: 2005 Buick LeSabre Rotor, Rear Brake
Vehicle Fitment- 2005 Buick LeSabre | Custom, Limited | 6 Cyl 3.8 L GAS
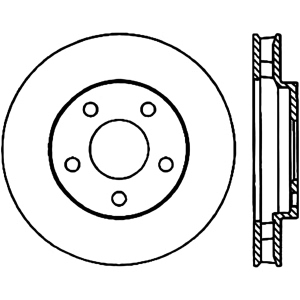

Centric® Premium™ Brake Rotor for 2005 Buick LeSabre
PartNumber: 125.62057Product Specifications- Notes: 15" Whls
- UPC: 805890132219
- Part Description: 2005 Buick LeSabre Premium™ Brake Rotor
Vehicle Fitment- 2005 Buick LeSabre | All Trims | All Engines


Centric® Gcx Brake Rotor for 2005 Buick LeSabre
PartNumber: 320.62057FProduct Specifications- Notes: 15" Wheels
- UPC: 889590391572
- Part Description: 2005 Buick LeSabre Gcx Brake Rotor
Vehicle Fitment- 2005 Buick LeSabre | All Trims | All Engines


Centric® Gcx Brake Rotor for 2005 Buick LeSabre
PartNumber: 320.62087FProduct Specifications- Notes: 16" Wheels
- UPC: 889590391732
- Part Description: 2005 Buick LeSabre Gcx Brake Rotor
Vehicle Fitment- 2005 Buick LeSabre | All Trims | All Engines
FAQ for Brake Disc Repair
Q: What should be noticed in refinishing Brake Rotor?
A:
The disc brake rotors do not require refinishing as part of routine brake system service. New disc brake rotors do not require refinishing. Before refinishing a brake rotor, the rotor must first be checked for adequate thickness to allow the rotor to be refinished and remain above the minimum allowable thickness after the refinishing specification. Whenever the brake rotor has been separated from the hub/axle flange, you should clean any rust or contaminants from the hub/axle flange and the brake rotor mating surfaces.
By Bob
GM Specialist
01/11/2022Q: How to remove the Brake Rotor-Rear?
A:
You should remove the tire and wheel assembly, install a C-clamp over the body of the brake caliper, with the C-clamp ends against the rear of the caliper body and the outboard disc brake pad, compress the piston into the caliper bore just enough to allow the caliper to slide away from the rotor, remove the C-clamp, remove the brake caliper and bracket from the vehicle, support the caliper assembly away from the rotor, mark the relationship of the rotor to the hub and remove the brake rotor.
By Bob
GM Specialist
01/11/2022Q: What should be cautioned in using the Brake Rotor/Disc?
A:
You should support the brake caliper with heavy mechanic's wire, or equivalent, whenever it is separated from its mount and the hydraulic flexible brake hose is still connected.
By Bob
GM Specialist
01/11/2022Q: How to install the Brake Rotor-Rear?
A:
You should clean any rust or corrosion from the mating surface of the hub/axle flange, use the J 41013, to thoroughly clean any rust or corrosion from the mating surface and mounting surface of the brake rotor, inspect the mating surfaces of the hub/axle flange and the rotor, install the brake rotor to the hub/axle flange, install the brake caliper and bracket assembly, install the tire and wheel assembly and lower the vehicle.
By Bob
GM Specialist
01/11/2022Q: How to remove the Brake Rotor-Front?
A:
You should remove the tire and wheel assembly, install a C-clamp over the body of the brake caliper, with the C-clamp ends against the rear of the caliper body and the outboard disc brake pad, compress the piston into the caliper bore just enough to allow the caliper to slide away from the rotor, remove the C-clamp, remove the brake caliper and the caliper mounting bracket as an assembly from the suspension knuckle and support the assembly with heavy mechanic's wire, or equivalent, ensure that there is no tension on the hydraulic brake flexible hose, mark the relationship of the rotor to the hub and remove the brake rotor.
By Bob
GM Specialist
01/11/2022Q: How to install the Brake Rotor-Front?
A:
You should use the J 42450-A thoroughly clean any rust or corrosion from the mating surface of the hub/axle flange, clean any rust or corrosion from the mating surface and mounting surface of the brake rotor, inspect the mating surfaces of the hub/axle flange and the rotor, install the brake rotor to the hub/axle flange, install the tire and wheel assembly and lower the vehicle.
By Bob
GM Specialist
01/11/2022Q: What should be cautioned about Brake Rotor Assembled Lateral Runout (LRO) Correction?
A:
The indexing method of correcting assembled LRO is most effective when the LRO specification is only exceeded by a relatively small amount: 0.025-0.127 mm (0.001-0.005 in). Indexing is used to achieve the best possible match of high spots to low spots between related components. The correction plate method of correcting assembled LRO involves the addition of a tapered plate between the brake rotor and the hub/axle flange. The correction plate method can be used to correct LRO that exceeds the specification by up to 0.23 mm (0.009 in). The on-vehicle brake lathe method is used to bring the LRO to within specifications by compensating for LRO while refinishing the brake rotor.
By Bob
GM Specialist
01/11/2022Q: What should be cautioned about Brake Rotor Assembled Lateral Runout (LRO) Correction-Correction Plates?
A:
Brake rotor thickness variation must be checked BEFORE checking for assembled lateral runout (LRO). Thickness variation exceeding the maximum acceptable level can cause brake pulsation. Brake rotor assembled lateral runout (LRO) exceeding the maximum allowable specification can cause thickness variation to develop in the brake rotor over time, usually between 4 800-11 300 km (3,000-7,000 mi). You can not install used correction plates in an attempt to correct brake rotor assembled lateral runout (LRO) and can not20 stack up, or install more than one correction plate onto one hub/axle flange location, in an attempt to correct brake rotor assembled LRO.
By Bob
GM Specialist
01/11/2022Q: What should be cautioned about the Brake Rotor Assembled Lateral Runout (LRO) Correction-On-Vehicle Lathe?
A:
If at any time the brake rotor exceeds the minimum allowable thickness after refinishing specification, the brake rotor must be replaced. If the brake rotor assembled LRO measurement still exceeds the maximum allowable specification, you should refer to Brake Rotor Assembled Lateral Runout (LRO) Correction. If the brake rotor assembled LRO is within specification, you should install the brake caliper and depress the brake pedal several times to secure the rotor in place before removing the J45101-100 and the lug nuts.
By Bob
GM Specialist
01/11/2022Q: What should be cautioned about the Brake Rotor Assembled Lateral Runout (LRO) Correction-Indexing?
A:
You should remove the J45101-100 and the lug nuts that were installed during the assembled LRO measurement procedure, inspect the mating surface of the hub/axle flange and the brake rotor to ensure that no foreign particles or debris are remaining, index the brake rotor in a different orientation to the hub/axle flange, hold the rotor firmly in place against the hub/axle flange and install one of the J45101-100 and one lug nut onto the upper-most wheel stud, continue to hold the rotor secure and tighten the lug nut firmly by the hand and install the remaining J45101-1OO and lug nuts onto the wheel studs and tighten the nuts firmly by the hand in a star-pattern.
By Bob
GM Specialist
01/11/2022See more FAQs (5)


