< Back ×
My Vehicle Change Vehicle
2005 Buick LeSabre
< Back to View All
Light Relays, Switches & Control Modules
- Department
- Prices
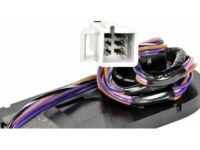
OEM (Genuine) 2005 Buick LeSabre Theft Deterrent Module Assembly
PartNumber: 10355946 Product Specifications
- Item Dimensions: 4.2 x 4.2 x 2.1 inches
- Item Weight: 0.50 Pounds
- Fitment Type: Direct Replacement
- Replaces: 09383080, 10303382, 16266469, 9383080, 16265419
- Part Description: 2005 Buick LeSabre Theft Deterrent Module Assembly
Vehicle Fitment- 2005 Buick LeSabre | Custom, Limited | 6 Cyl 3.8 L GAS
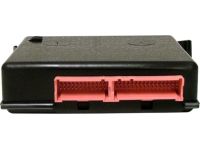
$158.76 MSRP:$315.02You Save: $156.26 (50%)OEM (Genuine) 2005 Buick LeSabre Programmer Asm, Heater & A/C
PartNumber: 12214171 Product Specifications
- Notes: Bonneville, Lesabre
- Other Names: AC Programmer, Control Module, Programmer
- Item Dimensions: 10.0 x 6.6 x 3.3 inches
- Item Weight: 0.90 Pounds
- Fitment Type: Direct Replacement
- Replaces: 9392695, 16239832, 09392695
- Part Description: 2005 Buick LeSabre Programmer Asm, Heater & A/C
Vehicle Fitment- 2005 Buick LeSabre | Custom, Limited | 6 Cyl 3.8 L GAS
FAQ for Body Control Module Repair
Q: How to install the Dash Integration Module?
A:
You should connect the electrical connectors, install the DIM into the bracket, install the right sound insulator and reprogram the DIM.
By Bob
GM Specialist
01/11/2022Q: How to remove the Dash Integration Module?
A:
Before replacement, you should record the personalization settings to transfer to the new module (if they are available). Then you should remove the right sound insulator, remove the dash integration module (DIM) from the bracket and disconnect the electrical connectors.
By Bob
GM Specialist
01/11/2022Q: How to install the Instrument Panel Module (RHD)?
A:
You should install the IPM to the vehicle, connect the electrical connectors to the IPM, install the IPM to the IP retainer by inserting the top tab of the module into the slot on the IP retainer and rotating down, install the fastener, install the left closeout/insulator panel and program the instrument panel module.
By Bob
GM Specialist
01/11/2022Q: How to remove the Instrument Panel Module (RHD)?
A:
You should remove the left sound insulator, remove the fastener from the instrument panel module (IPM), rotate the IPM up and off of the instrument panel (I/P) retainer, disconnect the electrical connectors from the IPM and remove the IPM from the vehicle.
By Bob
GM Specialist
01/11/2022Q: How to install the Rear Integration Module?
A:
You should install the RIM, connect the RIM electrical connectors, install the RIM with the push pin retainers, reposition the rear seat back insulator, install the rear seat back and install the rear seat cushion and reprogram the RIM.
By Bob
GM Specialist
01/11/2022Q: How to remove the Rear Integration Module?
A:
Before replacing the rear integration module (RIM), you should record the personalization settings to transfer to the new module (if they are available), remove the rear seat cushion, remove the rear seat back, move the rear seat back insulator aside, remove the push pin retainers, disconnect the RIM electrical connectors and remove the RIM.
By Bob
GM Specialist
01/11/2022Q: What should we know about the Body Control Module Programming/RPO Configuration (IPM)?
A:
You should ensure the scan tool has been updated with the latest software version, and connect a scan tool to the data link connector (DLC). The ignition should be ON, but the engine should not be operating. Then you should select Instrument Panel Module, Special Functions, Miscellaneous Test, and IPM Recalibration.
By Bob
GM Specialist
01/11/2022See more FAQs (2)


