< Back ×
My Vehicle Change Vehicle
2002 Buick Rendezvous
< Back to View All
Door Sheet Metal, Moldings & Weatherstrips
- Department
- Prices
OEM (Genuine) 2002 Buick Rendezvous Weatherstrip Asm-Front Side Door
PartNumber: 10313535 Product Specifications
- Location: Driver Side; Passenger Side
- Other Names: Weatherstrip
- Item Dimensions: 22.7 x 22.7 x 5.8 inches
- Item Weight: 0.70 Pounds
- Fitment Type: Direct Replacement
- Part Description: 2002 Buick Rendezvous Weatherstrip Asm-Front Side Door
Vehicle Fitment- 2002 Buick Rendezvous | CX, CX Plus, CXL, CXL Plus, Ultra | 6 Cyl 3.4 L GAS, 6 Cyl 3.5 L GAS, 6 Cyl 3.6 L GAS
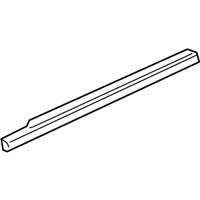
OEM (Genuine) 2002 Buick Rendezvous Sealing Strip Asm-Rear Side Door Window Outer
PartNumber: 21995151 Product Specifications
- Location: Passenger Side
- Other Names: Belt Weatherstrip
- Item Dimensions: 34.3 x 2.6 x 1.2 inches
- Item Weight: 0.70 Pounds
- Fitment Type: Direct Replacement
- Replaces: 10319248, 10421094
- Part Description: 2002 Buick Rendezvous Sealing Strip Asm-Rear Side Door Window Outer
Vehicle Fitment- 2002 Buick Rendezvous | CX, CX Plus, CXL, CXL Plus, Ultra | 6 Cyl 3.4 L GAS, 6 Cyl 3.5 L GAS, 6 Cyl 3.6 L GAS
OEM (Genuine) 2002 Buick Rendezvous Sealing Strip Asm-Rear Side Door Window Outer
PartNumber: 21995152 Product Specifications
- Location: Driver Side
- Other Names: Belt Weatherstrip
- Item Dimensions: 34.5 x 3.8 x 1.6 inches
- Item Weight: 0.70 Pounds
- Fitment Type: Direct Replacement
- Replaces: 10319249, 10421095
- Part Description: 2002 Buick Rendezvous Sealing Strip Asm-Rear Side Door Window Outer
Vehicle Fitment- 2002 Buick Rendezvous | CX, CX Plus, CXL, CXL Plus, Ultra | 6 Cyl 3.4 L GAS, 6 Cyl 3.5 L GAS, 6 Cyl 3.6 L GAS
OEM (Genuine) 2002 Buick Rendezvous Weatherstrip Asm-Rear Side Door
PartNumber: 10313536 Product Specifications
- Location: Passenger Side
- Other Names: Door Weatherstrip
- Item Dimensions: 23.4 x 22.7 x 5.7 inches
- Item Weight: 0.60 Pounds
- Fitment Type: Direct Replacement
- Part Description: 2002 Buick Rendezvous Weatherstrip Asm-Rear Side Door
Vehicle Fitment- 2002 Buick Rendezvous | CX, CX Plus, CXL, CXL Plus, Ultra | 6 Cyl 3.4 L GAS, 6 Cyl 3.5 L GAS, 6 Cyl 3.6 L GAS
OEM (Genuine) 2002 Buick Rendezvous Weatherstrip Asm-Rear Side Door
PartNumber: 10313537 Product Specifications
- Location: Driver Side
- Other Names: Door Weatherstrip
- Item Dimensions: 23.4 x 22.7 x 5.6 inches
- Item Weight: 5.30 Pounds
- Fitment Type: Direct Replacement
- Part Description: 2002 Buick Rendezvous Weatherstrip Asm-Rear Side Door
Vehicle Fitment- 2002 Buick Rendezvous | CX, CX Plus, CXL, CXL Plus, Ultra | 6 Cyl 3.4 L GAS, 6 Cyl 3.5 L GAS, 6 Cyl 3.6 L GAS
FAQ for Door Seal Repair
Q: What should be noticed when you install joint butt ends together?
A:
The joint butt ends must have no gap and be located in the center of the rocker panel area.
By Bob
GM Specialist
01/11/2022Q: What tools are needed to remove and install the auxiliary weatherstrip?
A:
You will need J 38778 Door Trim Pad and Garnish Clip Remover.
By Bob
GM Specialist
01/11/2022Q: How do you remove the front door opening weatherstrip?
A:
You can remove the front door sill plates, remove the windshield garnish molding, remove the upper center pillar trim panel, remove the center lower trim panel, and remove the front door opening weatherstrip by pulling it off the pinch weld flange.
By Bob
GM Specialist
01/11/2022Q: How do you remove the center pillar auxiliary weatherstrip?
A:
You can open the front and rear doors and remove the center pillar auxiliary weatherstrip.
By Bob
GM Specialist
01/11/2022Q: What's the recommended torque for the rear window channel screw?
A:
The recommended torque is 10 N.m (89 lb in).
By Bob
GM Specialist
01/11/2022Q: How to remove the rear door window weatherstrip?
A:
You will need to place the rear window in the full down position, remove the trim panel, the water deflector, and the outer belt sealing strip, then remove the screw from the rear window channel, and remove the channel from the rear door.
By Bob
GM Specialist
01/11/2022Q: What's the installation procedure for the center pillar auxiliary weatherstrip?
A:
The installation procedure is to align the center pillar auxiliary weatherstrip top push-in retainers to the top hole in the center pillar and install the center pillar auxiliary weatherstrip working downward pressing in the remainder of the push-in retainers until fully seated.
By Bob
GM Specialist
01/11/2022Q: What's the proper way to remove the rear door opening weatherstrip?
A:
The proper way is to open the rear door, remove the rear door sill plates, the rear quarter upper trim panel, the rear quarter lower trim panel, the upper center pillar trim panel, and the center lower trim panel, then remove the rear door opening weatherstrip by pulling it off the pinch weld flange.
By Bob
GM Specialist
01/11/2022Q: What should be done before removing the auxiliary weatherstrip?
A:
You will need to open the rear door.
By Bob
GM Specialist
01/11/2022Q: What should be done before removing the front door opening weatherstrip?
A:
You will need to open the front door.
By Bob
GM Specialist
01/11/2022See more FAQs (5)


