< Back ×
My Vehicle Change Vehicle
2001 Chevrolet Venture
< Back to View All
Suspension System Components
- Department
- Prices
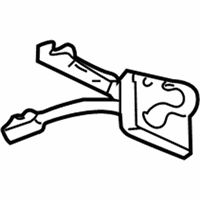
OEM (Genuine) 2001 Chevrolet Venture Sensor, Auto Level Control
PartNumber: 22189430 Product Specifications
- Notes: All Models; W/O AWD
- Other Names: Rear Sensor, Sensor
- Item Dimensions: 12.7 x 3.2 x 3.6 inches
- Item Weight: 1.10 Pounds
- Fitment Type: Direct Replacement
- Replaces: 22154038
- Part Description: 2001 Chevrolet Venture Sensor, Auto Level Control
Vehicle Fitment- 2001 Chevrolet Venture | Base, LS, LT, Plus, Value, Warner Bros. | 6 Cyl 3.4 L GAS
FAQ for Ride Height Sensor Repair
Q: How to remove the automatic level control sensor link ball stud?
A:
You need to remove the ELC/TRAILER fuse, raise and support the vehicle, then remove the automatic level control sensor link from the tie rod ball stud, and remove the ball stud from the rear axle tie rod.
By Bob
GM Specialist
02/11/2022Q: How to install the automatic level control sensor?
A:
You need to install the automatic level control sensor to the bracket, install the height sensor bolts/screws, the automatic level control sensor with the bracket, the height sensor bracket bolts/screws, install the automatic level control sensor link to the tie rod ball stud, install the automatic level control sensor connector to the underbody rail, install the automatic level control sensor connector, then install the ELC/TRAILER fuse, finally perform the system operation check to ensure that the system operates properly.
By Bob
GM Specialist
02/11/2022Q: What is the recommended torque for the height sensor bracket bolts/screws?
A:
The recommended torque is 10 Nm (89-inch lbs.).
By Bob
GM Specialist
02/11/2022Q: What is the proper way to install the automatic level control sensor link ball stud?
A:
You should install the ball stud to the rear axle tie rod, install the automatic level control sensor link to the tie rod ball stud, lower the vehicle, then install the ELC/TRAILER fuse.
By Bob
GM Specialist
02/11/2022Q: How to manually adjust the height sensor?
A:
You need to load 181 kg (400 lbs.) or more into the rear of the passenger compartment (enough load to activate the compressor), distributed evenly from left to right, raise and support the vehicle, inspect the height sensor for damage and ensure that the height sensor link is properly connected to the tie rod and height sensor arm, then turn the ignition ON, wait for approximately one minute for the arc to complete, finally measure the D dimension at the rear axle on the vehicle right side and the vehicle left side.
By Bob
GM Specialist
02/11/2022Q: What is the proper way to install the level control sensor link?
A:
You should install the link to the tie rod and the sensor arm, then lower the vehicle.
By Bob
GM Specialist
02/11/2022Q: How to remove the level control sensor link?
A:
You need to raise and support the vehicle, remove the ALC sensor link from the tie rod ball stud, and remove the ALC sensor link from the sensor arm ball stud.
By Bob
GM Specialist
02/11/2022Q: What is the recommended torque for the height sensor ball stud
A:
The recommended torque is 4 Nm (35-inch lbs.).
By Bob
GM Specialist
02/11/2022Q: What is the recommended torque for the height sensor adjuster bolt?
A:
The recommended torque is 5 Nm (44-inch lbs.).
By Bob
GM Specialist
02/11/2022See more FAQs (4)


