< Back ×
My Vehicle Change Vehicle
2000 Chevrolet Tracker
< Back to View All
Rocker Panels & Floors
- Department
- Prices
OEM (Genuine) 2000 Chevrolet Tracker Panel, Front Floor (On Esn)
PartNumber: 91176859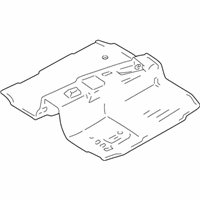 Product Specifications
- Notes: 4 Door; 2 Door
- Other Names: Front Floor Pan
- Item Weight: 46.60 Pounds
- Fitment Type: Direct Replacement
- Part Description: 2000 Chevrolet Tracker Panel, Front Floor (On Esn)
Vehicle Fitment- 2000 Chevrolet Tracker | Base, LSi, LT, ZR2 | 4 Cyl 1.6 L GAS, 4 Cyl 2.0 L GAS, 6 Cyl 2.5 L GAS
OEM (Genuine) 2000 Chevrolet Tracker Panel Asm, Center Floor (On Esn)
PartNumber: 30027283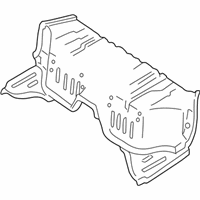 Product Specifications
- Notes: 4 Door
- Other Names: Center Floor Pan
- Item Dimensions: 33.2 x 18.7 x 67.5 inches
- Item Weight: 38.70 Pounds
- Fitment Type: Direct Replacement
- Part Description: 2000 Chevrolet Tracker Panel Asm, Center Floor (On Esn)
Vehicle Fitment- 2000 Chevrolet Tracker | Base, LSi, LT, ZR2 | 4 Cyl 1.6 L GAS, 4 Cyl 2.0 L GAS, 6 Cyl 2.5 L GAS
OEM (Genuine) 2000 Chevrolet Tracker Panel, Intermediate Floor
PartNumber: 30023571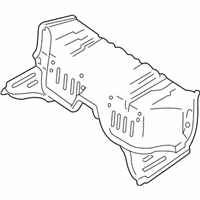 Product Specifications
- Notes: 2 Door
- Other Names: Center Floor Pan
- Item Dimensions: 63.4 x 17.1 x 16.4 inches
- Item Weight: 19.90 Pounds
- Fitment Type: Direct Replacement
- Part Description: 2000 Chevrolet Tracker Panel, Intermediate Floor
Vehicle Fitment- 2000 Chevrolet Tracker | Base, LSi, ZR2 | 4 Cyl 1.6 L GAS, 4 Cyl 2.0 L GAS, 6 Cyl 2.5 L GAS
OEM (Genuine) 2000 Chevrolet Tracker Panel, Rear Floor (On Esn)
PartNumber: 30021089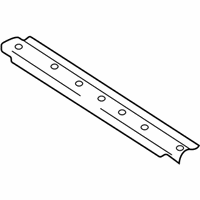 Product Specifications
- Notes: 4 Door
- Other Names: Floor Pan
- Item Weight: 17.20 Pounds
- Fitment Type: Direct Replacement
- Part Description: 2000 Chevrolet Tracker Panel, Rear Floor (On Esn)
Vehicle Fitment- 2000 Chevrolet Tracker | Base, LSi | 4 Cyl 1.6 L GAS, 4 Cyl 2.0 L GAS
OEM (Genuine) 2000 Chevrolet Tracker Panel, Rear Floor (On Esn)
PartNumber: 91176863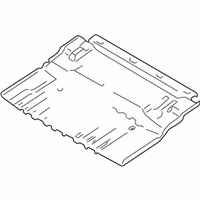 Product Specifications
- Notes: 2 Door
- Other Names: Rear Floor Pan
- Item Dimensions: 31.0 x 44.9 x 1.7 inches
- Item Weight: 10.90 Pounds
- Fitment Type: Direct Replacement
- Part Description: 2000 Chevrolet Tracker Panel, Rear Floor (On Esn)
Vehicle Fitment- 2000 Chevrolet Tracker | Base, LSi | 4 Cyl 1.6 L GAS, 4 Cyl 2.0 L GAS
FAQ for Floor Pan Repair
Q: What is the proper way to install the rear floor panel carpet (4 Door)?
A:
The proper way is to install the rear floor carpet to the vehicle, install the rear floor rear trim plate, install the rear floor carpet to the rear seat back cushions, and then return the rear seat back cushions to the upright position.
By Bob
GM Specialist
29/10/2022Q: What is the removal procedure for the front floor panel carpet?
A:
The procedure is to remove the front seats, remove the rear floor console, remove the front floor footrest, remove the body hinge pillar trim panels, remove the rear seat cushion, remove the 2 plastic retainers which secure each side of the front floor panel carpet to the bulkhead, and then remove the front floor panel carpet from the vehicle.
By Bob
GM Specialist
29/10/2022Q: What is the removal procedure for the rear floor panel carpet (4 Doors)?
A:
The procedure is to fold the rear seat back cushions forward, remove the 3 plastic retainers from each rear seat back cushion which secures the rear floor carpet to the seat back cushion, remove the rear floor rear trim plate, and then remove the rear floor carpet from the vehicle.
By Bob
GM Specialist
29/10/2022Q: What is the removal procedure for the rear floor panel carpet?
A:
The procedure is to remove the rear compartment panel, remove the rear floor carpet from the rear seat back cushion by releasing the velcro, remove the rear floor rear trim plate, and then remove the rear floor carpet from the vehicle.
By Bob
GM Specialist
29/10/2022Q: What is the proper way to install the front floor panel carpet?
A:
The proper way is to install the front floor panel carpet to the vehicle, install the 2 plastic retainers which secure each side of the front floor panel carpet to the bulkhead, install the front side door sill trim plate, install the front floor console, and then install the front seats.
By Bob
GM Specialist
29/10/2022Q: What is the proper way to install the front side door sill plate?
A:
The proper way is to install the front side door sill trim plate to the vehicle, and then secure the trim plate with the 4 plastic retainers.
By Bob
GM Specialist
29/10/2022Q: What is the removal procedure for the front side door sill plate?
A:
The procedure is to remove the 4 plastic retainers and the front side door sill trim plate from the vehicle.
By Bob
GM Specialist
29/10/2022Q: What is the proper way to install the rear floor panel carpet?
A:
The proper way is to install the rear floor carpet to the vehicle, install the rear floor rear trim plate, install the rear floor carpet to the rear seat back cushion, and then install the rear compartment panel.
By Bob
GM Specialist
29/10/2022See more FAQs (3)


