< Back ×
2000 Chevrolet Tracker Brake Master Cylinder
My Vehicle Change Vehicle
2000 Chevrolet Tracker
< Back to View All
Brake Boosters & Brake Master Cylinders
- Department
- Series
- Brands
- Prices
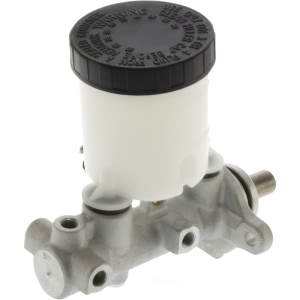
 $89.71Product Specifications
- UPC: 805890115915
- Part Description: 2000 Chevrolet Tracker Premium Brake Master Cylinder
Vehicle Fitment- 2000 Chevrolet Tracker | All Trims | 4 Cyl 1.6L
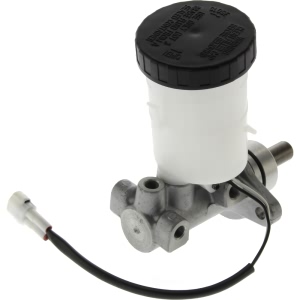
 $66.11Product Specifications
- UPC: 805890115908
- Part Description: 2000 Chevrolet Tracker Premium Brake Master Cylinder
Vehicle Fitment- 2000 Chevrolet Tracker | All Trims | 4 Cyl 2.0L
 $63.18Product Specifications
- UPC: 805890115717
- Part Description: 2000 Chevrolet Tracker Premium Brake Master Cylinder
Vehicle Fitment- 2000 Chevrolet Tracker | All Trims | 4 Cyl 2.0L

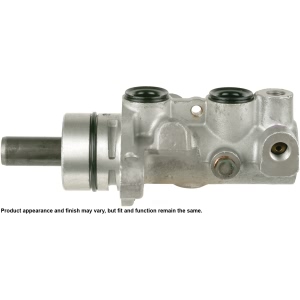
 Product Specifications
- Notes: Supplied w/o Reservoir
- Bore Diameter (N): 0.937"
- Bore Diameter (N-1): 1.315
- E-Waste: No
- Installation Hardware Included: No
- Master Cylinder Color/Finish: Gray
- Master Cylinder Material: Aluminum
- Mounting Hole Quantity: 2
- Package Contents: Master Cylinder
- Port Quantity: 2
- Primary Port Size: M10 x 1.0
- Product Condition: Remanufactured
- Reservoir Included: No
- Secondary Port Size: M10 x 1.0
- UPC: 082617633819
- Part Description: 2000 Chevrolet Tracker Remanufactured Master Cylinder
Vehicle Fitment- 2000 Chevrolet Tracker | All Trims | All Engines
 Product Specifications
- Notes: Supplied w/o Reservoir
- Bore Diameter (N): 0.937"
- Bore Diameter (N-1): 1.32
- E-Waste: No
- Installation Hardware Included: No
- Master Cylinder Color/Finish: Gray
- Master Cylinder Material: Aluminum
- Mounting Hole Quantity: 2
- Package Contents: Master Cylinder
- Port Quantity: 4
- Primary Port Size: M10 x 1.0
- Product Condition: Remanufactured
- Reservoir Included: No
- Secondary Port Size: M10 x 1.0
- UPC: 082617612784
- Part Description: 2000 Chevrolet Tracker Remanufactured Master Cylinder
Vehicle Fitment- 2000 Chevrolet Tracker | All Trims | 4 Cyl 2.0L
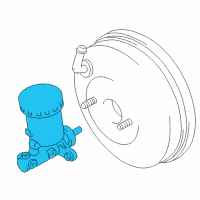 Product Specifications
- Notes: W/ABS
- Other Names: Master Cylinder
- Item Dimensions: 8.2 x 6.2 x 11.7 inches
- Item Weight: 1.20 Pounds
- Fitment Type: Direct Replacement
- Part Description: 2000 Chevrolet Tracker Master Cylinder
Vehicle Fitment- 2000 Chevrolet Tracker | Base, LSi, LT, ZR2 | 4 Cyl 1.6 L GAS, 4 Cyl 2.0 L GAS, 6 Cyl 2.5 L GAS
- Product Specifications
- Notes: W/O ABS, 2.0, 2.5 Liter
- Other Names: Master Cylinder
- Item Dimensions: 7.4 x 6.1 x 6.1 inches
- Item Weight: 1.20 Pounds
- Fitment Type: Direct Replacement
- Part Description: 2000 Chevrolet Tracker Cylinder Asm, Brake Master (On Esn)
Vehicle Fitment- 2000 Chevrolet Tracker | Base, LSi, LT, ZR2 | 4 Cyl 2.0 L GAS, 6 Cyl 2.5 L GAS
- Product Specifications
- Notes: W/O ABS, 1.6 Liter
- Item Dimensions: 10.6 x 8.8 x 6.8 inches
- Item Weight: 1.80 Pounds
- Part Description: 2000 Chevrolet Tracker Master Cylinder
Vehicle Fitment- 2000 Chevrolet Tracker | Base, LSi | 4 Cyl 1.6 L GAS
 Product Specifications
- Notes: Tracker
- Part Description: 2000 Chevrolet Tracker Brake Master Cylinder
Vehicle Fitment- 2000 Chevrolet Tracker | Base, LSi, LT, ZR2 | 4 Cyl 1.6 L GAS, 4 Cyl 2.0 L GAS, 6 Cyl 2.5 L GAS
FAQ for Brake Master Cylinder Repair
Q: How to perform the master cylinder reservoir filling?
A:
You should clean the reservoir cap before removal to avoid getting dirt into the reservoir, remove the master cylinder brake fluid reservoir cap, fill the reservoir until the fluid reaches the MAX mark, and then install the reservoir cap.
By Bob
GM Specialist
01/11/2022Q: What should be noticed about the master cylinder reservoir filling?
A:
You should not overfill the brake fluid reservoir. Overfilling the brake fluid reservoir may cause the brake fluid to overflow onto the engine exhaust components during brake system service. The brake fluid is flammable and may cause a fire and personal injury if the brake fluid contacts the engine exhaust system components.
By Bob
GM Specialist
01/11/2022Q: What is the removal procedure for the non-ABS brake master cylinder?
A:
The procedure is to disconnect the reservoir fluid level connector, remove the reservoir cap, remove the fluid with a syringe, remove the reservoir pin using a drift, remove the reservoir, and then remove the reservoir grommets.
By Bob
GM Specialist
01/11/2022Q: What is the proper way to install the non-ABS brake master cylinder?
A:
The proper way is to install the reservoir. Secure with the reservoir pin, install the reservoir diaphragm, install the reservoir cap, and then connect the reservoir fluid level connector.
By Bob
GM Specialist
01/11/2022Q: What is the proper way to install the brake master cylinder?
A:
The proper way is to install the O-ring to the master cylinder, install the primary piston assembly to the master cylinder, install the master cylinder to the brake booster, and then install the reservoir.
By Bob
GM Specialist
01/11/2022Q: What is the removal procedure for the brake master cylinder?
A:
The procedure is to disconnect the reservoir fluid level connector, remove the master cylinder attaching nuts, remove the master cylinder with the proportioning valve from the brake booster, and then separate the proportioning valve from the master cylinder.
By Bob
GM Specialist
01/11/2022Q: What is the disassembly procedure for the brake master cylinder?
A:
The procedure is to remove the reservoir from the master cylinder, remove the master cylinder from the booster, remove the piston stopper snap ring from the master cylinder, remove the piston stopper, remove the secondary piston assembly carefully from the master cylinder by tapping the flange on a piece of wood or two soft objects, remove the secondary piston pressure cup, and then remove the O-ring.
By Bob
GM Specialist
01/11/2022See more FAQs (2)